Build Unique Aquarium Furniture with These Detailed Plans

Dive into DIY: Building Unique Aquarium Furniture

So, you've got a gorgeous aquarium, maybe even a couple, and you're looking to upgrade your setup beyond the standard plastic stand and cabinet. You want something unique, something that reflects your personality and enhances your aquatic wonderland. Well, grab your tools, because we're about to embark on a DIY adventure to create some seriously awesome aquarium furniture!

Planning Your Perfect Project: Choosing the Right Style

Before we even think about sawing wood, let's brainstorm the kind of aquarium furniture you envision. Do you dream of a rustic, reclaimed wood masterpiece? Or perhaps a sleek, modern minimalist design? Maybe something whimsical and a little quirky? The possibilities are endless!

Considering Your Aquarium's Needs

First things first: your aquarium's weight and dimensions are crucial. A smaller tank is significantly easier to accommodate than a massive 100-gallon behemoth. You need a sturdy structure capable of supporting the weight of the water, the tank itself, substrate, rocks, decorations, and any inhabitants within. A poorly built stand could lead to catastrophic failure, so don't skimp on the materials or the construction!

Matching Your Home's Decor

Think about the overall aesthetic of your home. Does your living room lean towards traditional, contemporary, farmhouse, or something else entirely? Your aquarium furniture should complement your existing décor, not clash with it. Consider the color palette, materials, and overall style when making your choices.

Picking Your Perfect Materials

The materials you select will drastically influence the final look and durability of your furniture. Here are some popular options:

  • Pressure-treated lumber: Provides exceptional water resistance and durability, ideal for outdoor or high-humidity environments. But be aware of potential chemical leaching – always seal it properly!
  • Marine-grade plywood: Designed to withstand moisture, making it a great choice for aquarium furniture. Make sure it's properly sealed to prevent water damage.
  • Reclaimed wood: Adds a rustic charm, but requires careful treatment and sealing to prevent rot and warping.
  • Metal (steel or aluminum): Offers exceptional strength and modern aesthetics, but can be more challenging to work with and requires protective finishes to prevent rust.

Building a Solid Foundation: The Aquarium Stand

Let's assume you're building a stand for a moderately sized aquarium (say, 55 gallons). The design principles will scale up or down depending on your tank's dimensions.

Step-by-Step Construction

For a simple, strong stand, consider a basic frame construction using 2x4s. You'll need to cut the lumber to the precise dimensions needed to create a sturdy rectangle that is slightly larger than your aquarium's base. Use wood glue and screws to assemble the frame, ensuring square corners and strong joints. Add additional bracing for extra support, especially if you're housing a larger tank.

Once the frame is complete, you can add shelving. Again, use strong lumber and plenty of screws. Consider adding adjustable shelves for flexibility. Finally, top the stand with a sheet of plywood or a solid wood top that is larger than the aquarium base. This prevents the tank from directly contacting the frame and adds a polished finish.

Enhancing the Aesthetic

This is where your creativity shines! You can paint the stand a striking color, stain it for a natural look, or even tile it for a unique, water-themed aesthetic. Consider adding decorative trim, molding, or even integrated lighting to elevate the design.

Adding Flair: The Aquarium Cabinet

A matching cabinet provides additional storage for your aquarium supplies, filters, and other equipment. This can be as simple or elaborate as you like.

Matching the Stand's Style

The cabinet should visually complement the stand. If you've built a rustic stand, a matching rustic cabinet is a natural choice. Similarly, a modern stand calls for a sleek, contemporary cabinet.

Storage Solutions

Plan your cabinet's storage carefully. Think about what you need to store and how best to organize it. Drawers are great for smaller items, while open shelves are better for larger equipment.

Construction Techniques

Similar to the stand, you can construct the cabinet from wood, using sturdy materials and strong joinery techniques. Consider adding hinges and hardware that match your chosen aesthetic. Remember, proper ventilation is key to prevent moisture build-up inside the cabinet.

Finishing Touches: Adding Personality

The real magic happens when you add your personal touches. This is what makes your aquarium furniture truly unique.

Custom Lighting

Integrated lighting under the stand or inside the cabinet can create a dramatic effect. You could incorporate LED strip lights for a modern look or use more traditional lighting fixtures for a vintage feel.

Creative Finishes

Experiment with different paint colors, stains, and finishes to personalize your furniture. Consider using stencils for intricate designs or even incorporating mosaic tiles for a truly bespoke look.

Commonly Asked Questions

Q: How much weight can my aquarium stand support?

A: This depends entirely on your stand's design and the materials used. Always overestimate the weight of your filled aquarium and ensure your stand is more than capable of supporting it. A structural engineer can provide exact weight capacity estimations.

Q: What kind of sealant should I use?

A: Choose a high-quality, waterproof sealant designed for exterior use. Apply multiple coats for optimal protection.

Q: Can I use regular plywood for my aquarium stand?

A: While possible, it's not recommended. Regular plywood is not designed to withstand moisture and can warp or rot. Marine-grade plywood or pressure-treated lumber are much better choices.

Q: How do I ensure my stand is level?

A: Use a level to check the stand's levelness during construction and after completion. Adjust the feet as needed to ensure a perfectly level surface for your aquarium.

Q: What if I don't have woodworking experience?

A: Don't worry! Start with simpler designs and don't be afraid to ask for help from friends, family, or local woodworking professionals. There are countless online resources and tutorials available to guide you.

Building your own aquarium furniture is a rewarding project. It combines creativity, craftsmanship, and your passion for aquariums. So, gather your supplies, get creative, and enjoy the process of building a truly unique and stunning centerpiece for your home!

Read More..

Creative Do-It-Yourself Woodworking Plans for Custom Furniture Projects

Unleash Your Inner Craftsperson: DIY Woodworking Projects for Custom Furniture

Hey there, fellow furniture enthusiasts! Are you tired of mass-produced furniture that lacks character and personality? Do you dream of creating unique pieces that reflect your style and add a touch of warmth to your home? Then you've come to the right place! This guide is packed with creative DIY woodworking plans for custom furniture projects, perfect for beginners and experienced woodworkers alike. Get ready to roll up your sleeves, grab your tools, and embark on a rewarding journey of creation!

Transforming Your Space with a Custom Coffee Table

Let's start with a classic: the coffee table. It's a focal point in any living room, and building your own allows for complete customization. Forget those generic, mass-produced pieces! Imagine a coffee table crafted from reclaimed wood, showcasing its unique grain and character. Or perhaps a sleek, modern design with clean lines and hidden storage. The possibilities are endless!

Rustic Charm with Reclaimed Wood

This project uses salvaged wood – maybe old barn boards or even pallet wood (make sure it's treated properly!). The key is to embrace the imperfections. The knots, cracks, and variations in color add to its rustic charm. You can use simple joinery techniques like mortise and tenon or even just strong screws and wood glue. Finish it with a clear coat to protect the wood and enhance its natural beauty.

Materials You'll Need:

  • Reclaimed wood planks
  • Wood glue
  • Screws
  • Clamps
  • Sandpaper (various grits)
  • Clear wood sealant
  • Optional: Casters for mobility

Modern Minimalist Coffee Table

For a contemporary look, opt for a sleek design using plywood or solid hardwood like maple or walnut. Keep the lines clean and simple. Consider incorporating metal legs for a modern industrial vibe. This project involves precise cuts and potentially some more advanced joinery, like dado joints or pocket holes.

Materials You'll Need:

  • Plywood or hardwood sheets
  • Metal legs (or wooden legs of your choice)
  • Wood glue
  • Screws or dowels
  • Sandpaper
  • Stain or paint (optional)
  • Clear coat finish

Building a Statement Piece: The Custom Bookshelf

Bookshelves aren't just for books! They're fantastic display spaces for your favorite objects, plants, and artwork. A custom bookshelf lets you tailor the design to perfectly fit your space and style. Think about incorporating cubbies of varying sizes, open shelves, or even a built-in desk area.

The Classic Floating Bookshelf

Floating shelves create a clean, modern look. They appear to float on the wall, giving the illusion of more space. This is a relatively straightforward project, perfect for beginners. You'll need strong brackets hidden behind the shelves for support. The finish can be simple and clean, or you can get creative with paint or stain.

Materials You'll Need:

  • Wood boards (pine, oak, etc.)
  • Heavy-duty shelf brackets
  • Screws
  • Wall anchors (depending on your wall type)
  • Sandpaper
  • Stain or paint (optional)
  • Clear coat finish (optional)

A Multifunctional Bookshelf/Desk Combo

This project combines the best of both worlds! It's a space-saving solution that offers both storage and a workspace. You can integrate a small desk area into the design, adding a shelf above for extra storage. This requires careful planning and precise measurements, but the end result is worth the effort.

Materials You'll Need:

  • Wood boards (various sizes)
  • Wood glue
  • Screws
  • Sandpaper
  • Stain or paint (optional)
  • Clear coat finish (optional)
  • Drawer slides (if adding drawers)

Beyond the Basics: More Creative DIY Furniture Ideas

Feeling ambitious? Let's explore some more advanced, yet incredibly rewarding, projects:

A Custom-Built Dining Table

A dining table is the heart of your home. Building your own allows you to choose the perfect size, shape, and style. Consider a farmhouse-style table with chunky legs and a wide, solid top, or a more modern design with sleek metal legs and a minimalist top. This project might require some serious woodworking skills and tools, but the result is a stunning centerpiece for your dining room.

A Stylish Headboard for Your Bedroom

A unique headboard can instantly elevate the look of your bedroom. From a simple, minimalist design to a more elaborate piece with intricate carvings or built-in lighting, the possibilities are endless. Use reclaimed wood for a rustic feel, or opt for a sleek, modern design using plywood and paint.

A Charming Bench for Your Entryway

A welcoming bench in your entryway provides a practical spot to sit while putting on your shoes. This project is surprisingly achievable, even for beginners. You can build a simple bench with straight legs or add curves and decorative elements for a more ornate design.

Commonly Asked Questions

Q: What tools do I need to get started?

A: The essential tools include a measuring tape, saw (hand saw or circular saw), drill, screwdriver, sandpaper, and wood glue. More advanced projects may require additional tools like a router, planer, or joinery tools.

Q: What type of wood should I use?

A: The best type of wood depends on your project and budget. Pine is a budget-friendly option, while hardwoods like oak, maple, or walnut offer greater durability and a more refined look.

Q: Where can I find woodworking plans?

A: You can find countless woodworking plans online, in books, and magazines. Websites like Ana White and Pinterest are excellent resources.

Q: I'm a beginner. Where should I start?

A: Start with a simpler project like a floating shelf or a small side table. Practice your basic woodworking skills before tackling more complex projects. Don't be afraid to ask for help or advice from experienced woodworkers.

Happy building! Remember, the most important thing is to have fun and enjoy the process of creating something beautiful and unique with your own two hands. And don't be afraid to experiment and let your creativity shine through!

Read More..

DIY wooden furniture designs for modern homes

DIY Wooden Furniture Designs for Modern Homes: A Comprehensive Guide

The allure of handcrafted wooden furniture is undeniable. Its inherent warmth, timeless elegance, and sustainable nature resonate deeply with the modern aesthetic, offering a compelling alternative to mass-produced pieces. This guide explores a range of DIY wooden furniture designs perfectly suited for contemporary homes, providing detailed instructions and considerations for each project.

Section 1: Essential Considerations Before Commencing Your Project

Before embarking on any DIY furniture project, careful planning and preparation are crucial to ensure a successful outcome. This section outlines key factors to consider.

1.1 Choosing the Right Wood

The selection of wood significantly impacts the final product's appearance, durability, and workability. Hardwoods such as oak, walnut, and maple offer exceptional strength and longevity, ideal for high-traffic pieces like tables and chairs. Softwoods like pine and fir are easier to work with for beginners, suitable for projects requiring less structural integrity, such as shelves or smaller side tables. Consider the wood's grain pattern, color, and potential for finishing when making your selection.

1.2 Essential Tools and Equipment

The complexity of your chosen design dictates the necessary tools. A basic toolkit should include a measuring tape, pencil, saw (hand saw or circular saw), hand plane, chisels, sandpaper (various grits), clamps, wood glue, screws, and a drill. More advanced projects might require power tools such as a router, planer, and sander for smoother, more precise results. Investing in quality tools ensures accuracy and efficiency throughout the process.

1.3 Safety Precautions

Working with wood involves inherent risks. Always prioritize safety by wearing appropriate personal protective equipment (PPE), including safety glasses, dust mask, hearing protection (when using power tools), and work gloves. Ensure your workspace is well-lit and organized to minimize the chance of accidents. Familiarize yourself with the safe operation of all power tools before use and consult relevant safety manuals.

Section 2: DIY Projects for the Modern Home

This section showcases diverse DIY wooden furniture designs appropriate for a variety of modern interiors.

2.1 Minimalist Floating Shelves

Floating shelves offer a clean, space-saving solution for displaying books, plants, or decorative items. This project is ideal for beginners. Materials required include: chosen wood (e.g., pine), wood glue, screws, wall anchors (appropriate for your wall type), and a wood stain or paint of your choice. Construction involves cutting the shelves to the desired dimensions, attaching sturdy brackets to the back (hidden from view), and securely mounting them to the wall using appropriate anchors. A simple, minimalist design enhances the clean lines of modern interiors.

2.2 Modern Coffee Table with Integrated Storage

A coffee table with integrated storage offers both functionality and style. This project requires intermediate woodworking skills. Materials might include: plywood for the base and storage compartments, hardwood for the tabletop, wood glue, screws, hinges, and a chosen finish. The design incorporates a lift-top mechanism revealing hidden storage underneath. Precision cutting and assembly are crucial for a smooth, functional design. Consider adding caster wheels for easy mobility.

2.3 Mid-Century Modern Sideboard

A mid-century modern sideboard adds a touch of vintage charm to any contemporary space. This project requires advanced woodworking skills. Materials include: hardwood for the frame and doors, plywood for shelving, wood glue, screws, hinges, and a chosen finish. The design features clean lines, tapered legs, and simple door handles. Precise joinery techniques, such as dovetail joints, add strength and aesthetic appeal. The sideboard can be customized with varying numbers of drawers and shelves to suit individual needs.

2.4 Sleek Wooden Desk

A DIY wooden desk provides a personalized workspace tailored to individual preferences. This project requires intermediate to advanced woodworking skills, depending on the complexity of the design. Materials include: hardwood or plywood for the desktop and legs, wood glue, screws, and a chosen finish. Design considerations involve incorporating features such as cable management systems, drawer units, and adjustable height options. A simple, uncluttered design contributes to a productive and organized workspace.

Section 3: Finishing Touches and Maintenance

The final steps significantly influence the overall aesthetic and longevity of your DIY furniture. Proper finishing and maintenance are crucial.

3.1 Sanding and Finishing

Thorough sanding is essential to achieve a smooth surface. Start with coarser grit sandpaper and gradually progress to finer grits to remove imperfections and prepare the wood for finishing. Apply wood stain or paint according to the manufacturer's instructions, ensuring even coverage. Consider adding a sealant or varnish to protect the wood from moisture and scratches, enhancing durability and longevity.

3.2 Maintenance and Care

Regular maintenance helps preserve the beauty and functionality of your handcrafted furniture. Dust regularly with a soft cloth. Avoid placing hot items directly on the surface to prevent damage. For spills, immediately wipe them up to prevent staining. Periodically apply a wood polish or conditioner to maintain the wood's luster and protect it from dryness and cracking.

Section 4: Inspiration and Resources

Numerous online resources and platforms offer inspiration and guidance for DIY wooden furniture projects. Websites dedicated to woodworking, online tutorials, and social media communities provide access to a wealth of designs, techniques, and advice from experienced woodworkers. Explore these resources to discover new ideas and enhance your woodworking skills.

In conclusion, creating your own wooden furniture allows for personalized expression and the satisfaction of crafting unique pieces that perfectly complement your modern home. With careful planning, appropriate tools, and attention to detail, you can successfully build beautiful, functional, and long-lasting furniture for years to come. Remember to prioritize safety throughout the process and enjoy the rewarding experience of creating something truly special for your living space.

Read More..

How to Make a Rustic Wooden Wall Sign with Personalized Engraving

Crafting a Rustic Wooden Wall Sign with Personalized Engraving

Unleash your inner artisan and create a unique, personalized wooden wall sign that speaks volumes about your style and adds rustic charm to your home. This detailed guide walks you through the process, from selecting the perfect wood to the final engraving. Get ready to transform a simple piece of wood into a cherished keepsake!

Choosing Your Wood and Tools

The heart of your project lies in the wood itself. Opt for a reclaimed wood for an authentic rustic look, or choose a new piece of pine, cedar, or even oak, depending on your desired aesthetic and budget. Reclaimed wood often possesses beautiful natural variations in color and texture, adding character to your finished sign. For the tools, you'll need a few essentials: a saw (hand saw or circular saw), sandpaper (various grits), a wood burning tool (for engraving), a stencil (or masking tape and a sharpie), a wood stain (optional), and a clear sealant (essential for protection).

Gathering Your Supplies

Before you begin, gather all your materials in one place. This will streamline your workflow and prevent interruptions. Consider these items:

  • Wooden plank (choose your size and thickness)
  • Sandpaper (coarse, medium, and fine grits)
  • Wood burning tool with various tips
  • Stencil or masking tape and a fine-tip permanent marker
  • Wood stain (choose a color that complements your style â€" a dark walnut or a weathered gray works well for rustic aesthetics)
  • Clear sealant (water-based or oil-based, depending on your preference)
  • Safety glasses and gloves

Preparing the Wood

Begin by carefully cutting your wooden plank to your desired size and shape using your saw. Ensure your cuts are clean and straight. Then, move on to sanding. Start with coarser grit sandpaper to remove any rough edges or imperfections, gradually moving to finer grits for a smooth finish. This process is crucial for achieving a professional-looking final product. Pay close attention to the corners and edges, ensuring they are well-sanded and free from splinters.

Creating Your Design and Engraving

Now comes the fun part! Design your personalized message. Consider using a stencil for clean, crisp lettering, or get creative with freehand drawing using masking tape and a sharpie. If using a stencil, carefully secure it to your wooden plank using painter's tape. Once your design is ready, carefully use your wood burning tool to engrave your message. Take your time; precision makes a big difference in the final result. Experiment with different pressure levels and tool tips to vary line thickness and create visual interest.

Finishing Touches

Once your engraving is complete, apply your chosen wood stain if desired. Follow the manufacturer's instructions carefully, allowing ample drying time. This step enhances the wood's natural beauty and adds depth to your design. Once the stain is dry, apply several thin coats of clear sealant. This protects your artwork from moisture and wear, ensuring your rustic wooden wall sign will remain a beautiful piece for years to come. Allow sufficient drying time between coats and let the final coat cure completely before hanging.

Hanging Your Masterpiece

Finally, select the perfect spot in your home to hang your beautiful, personalized rustic wooden wall sign! You might add a simple sawtooth hanger to the back or use decorative hooks for a more rustic vibe. Admire your handiwork; you've successfully created a unique and treasured piece of home décor. The warmth and character of your handcrafted sign will bring a special touch to any room.

Read More..

DIY Wooden Key Holder for Entryways with Hooks for Keys and Accessories

A Comprehensive Guide to Crafting a Bespoke Wooden Key Holder for Enhanced Entryway Organization

The entryway, often the first and last impression of a home, frequently suffers from a lack of organized storage. A cluttered entryway can detract from the overall aesthetic appeal and create a sense of chaos. This guide provides a detailed and comprehensive approach to crafting a personalized wooden key holder, designed to elegantly manage keys, mail, and other small accessories, thus transforming your entryway into a welcoming and organized space.

I. Project Planning and Material Selection

A. Defining Project Scope and Functionality

Before embarking on the construction, carefully consider the desired dimensions and functionality of your key holder. Determine the number of hooks required to accommodate your household's keys and other items. Will it solely serve as a key holder, or will it incorporate additional features such as a mail slot, a shelf for small items, or a small cubby for frequently accessed items like sunglasses or dog leashes? Careful planning at this stage ensures a finished product that perfectly meets your needs.

B. Choosing the Right Wood

The choice of wood significantly impacts the aesthetics and durability of your key holder. Consider the following factors:

  • Hardwoods: Offer superior durability and a more refined aesthetic. Examples include oak, maple, walnut, and cherry. These woods are more resistant to scratches and dents and can withstand daily use. However, they often come at a higher price point.
  • Softwoods: More affordable but less durable than hardwoods. Pine, fir, and cedar are common choices. They are easier to work with for beginners, but may require more careful handling to prevent damage.
  • Plywood: A cost-effective alternative, particularly for larger projects. Plywood offers good stability and can be readily stained or painted to match your décor.
  • Reclaimed wood: Adds a unique character and sustainability to your project. Reclaimed wood often possesses interesting textures and variations in color, lending a rustic charm.

Consider the overall style of your entryway when selecting wood. A modern entryway might pair well with sleek maple or walnut, while a rustic setting might benefit from reclaimed wood or pine.

C. Essential Tools and Materials

Assembling your key holder requires a specific set of tools and materials. Ensure you have the following before you begin:

  • Wood: Based on your chosen dimensions and wood type.
  • Hooks: Select sturdy hooks appropriate for the weight of the items you intend to hang. Consider material (metal, ceramic) and style (modern, rustic).
  • Wood glue: A high-quality wood glue is essential for strong joints.
  • Screws or nails: Depending on your chosen fastening method. Use screws for superior strength and durability.
  • Sandpaper: Various grits (e.g., 80, 120, 220) for smoothing surfaces.
  • Wood stain or paint (optional): To enhance the wood's natural beauty or personalize the color.
  • Polyurethane sealant (optional): Protects the finished product from moisture and wear.
  • Measuring tape and pencil: For accurate measurements and markings.
  • Saw (hand saw or jigsaw): To cut the wood to the desired dimensions.
  • Drill with drill bits: For pilot holes (to prevent wood splitting) and for attaching hooks.
  • Clamps: To hold pieces together while the glue dries.
  • Safety glasses and dust mask: Essential for protecting your eyes and respiratory system from sawdust and debris.

II. Construction Process

A. Cutting and Shaping the Wood

Based on your design, accurately measure and cut the wood pieces using a saw. For intricate shapes, a jigsaw is recommended. Ensure precise cuts for a clean and professional finish. After cutting, sand the edges and surfaces to eliminate any roughness or splinters. Start with coarser grit sandpaper and progressively move to finer grits for a smooth surface.

B. Assembling the Key Holder

Apply wood glue to the joining surfaces of the wood pieces according to your design. Clamp the pieces together firmly and allow the glue to dry completely according to the manufacturer's instructions. This may take several hours or overnight. Once the glue is dry, remove the clamps and reinforce the joints using screws or nails, depending on your design and the strength required.

C. Attaching the Hooks

Drill pilot holes where you plan to attach the hooks. This prevents the wood from splitting. Then, securely attach the hooks using screws, ensuring they are firmly fastened and aligned properly. Ensure the hooks are positioned at a suitable height and spacing to accommodate your keys and other items.

D. Finishing Touches

Once the assembly is complete, sand any remaining imperfections. Then, apply wood stain or paint, if desired, following the manufacturer's instructions. Allow the stain or paint to dry completely before applying a protective sealant such as polyurethane. This adds a layer of protection against moisture and enhances the longevity of your key holder.

III. Customization and Personalization

The beauty of a DIY project lies in its ability to be personalized. Here are some ideas to customize your wooden key holder:

  • Engraving: Add a personal touch by engraving your family name, initials, or a meaningful quote onto the wood.
  • Decorative elements: Incorporate decorative elements such as small ceramic tiles, mosaic pieces, or metal accents.
  • Unique shapes: Instead of a standard rectangular shape, experiment with curved or irregular shapes to add visual interest.
  • Different finishes: Explore various stain colors and finishes to achieve a desired look, from a rustic patina to a modern sleek finish.
  • Integrated storage: Add a small shelf or cubby to the design for additional storage.

IV. Conclusion

Crafting a DIY wooden key holder is a rewarding project that combines creativity and practicality. By following the steps outlined in this guide, you can create a functional and aesthetically pleasing addition to your entryway. Remember to prioritize safety throughout the construction process and take your time to ensure a high-quality finished product. Your personalized key holder will not only enhance the organization of your entryway but also serve as a testament to your craftsmanship and attention to detail. Enjoy the process and the satisfaction of creating something unique for your home.

Read More..

Wooden Bird Feeders That Will Appeal to Eco-Friendly Buyers

Wooden Bird Feeders That Will Appeal to Eco-Friendly Buyers

Wooden Bird Feeders That Will Appeal to Eco-Friendly Buyers

In a world increasingly conscious of environmental impact, eco-friendly choices are becoming more than just a trend; they are a necessity. Bird feeders, a beloved staple in many gardens, are no exception. As consumers seek sustainable options, wooden bird feeders are gaining popularity, offering a natural and aesthetically pleasing alternative to plastic feeders. This article delves into the reasons why wooden bird feeders are gaining traction among eco-conscious buyers, exploring their environmental benefits and the key factors to consider when making a purchase.

The Growing Demand for Sustainable Bird Feeders

The demand for sustainable bird feeders stems from a growing awareness of the environmental impact of plastic waste. Plastic bird feeders, while often durable and affordable, can take hundreds of years to decompose, contributing to land pollution and harming wildlife. Consumers are increasingly opting for products that align with their values, choosing materials that are renewable, biodegradable, and minimally processed. This shift in consumer preferences is driving the popularity of wooden bird feeders, which offer a more environmentally responsible alternative.

Benefits of Wooden Bird Feeders for Eco-Conscious Buyers

Wooden bird feeders hold a significant appeal for eco-friendly buyers due to their inherent sustainability and environmental benefits. Here's a closer look at why these feeders are a better choice for the planet:

1. Renewable and Biodegradable Materials

Wood, a renewable resource, is the cornerstone of these feeders. Unlike plastic, which is derived from fossil fuels, wood is naturally replenished through responsible forestry practices. Additionally, wood is biodegradable, breaking down naturally over time, minimizing its impact on the environment. This makes wooden bird feeders a far more eco-conscious choice compared to plastic feeders.

2. Reduced Plastic Waste

By opting for wooden feeders, buyers actively contribute to reducing plastic waste. This minimizes the burden on landfills and the negative impacts of plastic on ecosystems and wildlife.

3. Natural Beauty and Integration with Gardens

Wooden bird feeders seamlessly blend into the natural environment, adding a touch of rustic charm to any garden. The warm tones and textures of wood complement surrounding greenery, enhancing the aesthetic appeal of outdoor spaces. This natural integration creates a harmonious setting for both birds and homeowners.

4. Support for Sustainable Forestry Practices

The growing demand for wooden bird feeders can incentivize sustainable forestry practices. When purchasing wooden feeders, it's essential to choose products made from responsibly sourced wood. Look for certifications like FSC (Forest Stewardship Council) or PEFC (Programme for the Endorsement of Forest Certification) to ensure that the wood comes from forests managed sustainably.

Key Factors to Consider When Choosing a Wooden Bird Feeder

While the benefits of wooden bird feeders are clear, there are some important factors to consider before making a purchase:

1. Wood Type and Durability

Different wood types offer varying levels of durability and resistance to weathering. Some popular choices include cedar, redwood, and pressure-treated pine. Cedar and redwood are naturally resistant to rot and insects, making them excellent choices for outdoor applications. Pressure-treated pine, while less naturally resistant, can be treated with preservatives for added longevity. The specific needs and preferences of the buyer will determine the best wood choice.

2. Construction Quality and Design

Choose feeders with sturdy construction, well-joined components, and durable finishes. A well-built feeder will withstand the elements and provide long-lasting enjoyment. The design of the feeder should also consider the needs of the birds, providing easy access to food and safe perching areas. A design that prevents squirrels from accessing the food is also essential.

3. Maintenance and Cleaning

While wooden feeders are naturally beautiful, they require regular maintenance to keep them in good condition. Cleaning and waterproofing the feeder regularly will prolong its lifespan. Using natural cleaning products and biodegradable paints or stains can further minimize the environmental impact of the feeder.

4. Local Craftsmanship and Support for Small Businesses

Consider supporting local craftspeople and small businesses that specialize in making wooden bird feeders. This not only fosters sustainable practices but also strengthens local economies.

Conclusion: A Greener Choice for Bird Lovers

Wooden bird feeders offer a compelling alternative to plastic feeders, aligning with the increasing demand for eco-friendly products. Their renewable materials, reduced plastic waste, natural aesthetics, and potential for supporting sustainable forestry practices make them a responsible choice for environmentally conscious buyers. By considering key factors such as wood type, construction quality, and maintenance practices, buyers can select wooden bird feeders that will provide years of enjoyment while minimizing their environmental impact.

Read More..

How to Build Wooden Key Racks That Appeal to Home Decor Lovers

How to Build Wooden Key Racks That Appeal to Home Decor Lovers

Craft the Perfect Key Rack: Enchanting Wooden Designs for Every Home

Keys, the silent guardians of our homes, deserve more than just a haphazard toss on the countertop. A thoughtfully crafted key rack elevates this everyday object to a statement piece, adding a touch of warmth and personality to any entryway. Embrace the artistry of woodworking to create a key rack that's not just functional, but also a captivating focal point in your home decor.

Embrace the Charm of Natural Wood

The beauty of wood is its inherent warmth and character. Choose from a variety of wood types to match your home's aesthetic: the classic elegance of walnut, the rustic charm of pine, the sleek sophistication of maple, or the vibrant energy of cherry. Each wood species brings unique grain patterns and color tones, adding a touch of nature's artistry to your key rack.

Go Beyond the Traditional

While traditional key racks often feature simple rows of hooks, explore more creative designs to make your piece truly stand out. Experiment with:

  • Geometric Shapes: Sculpt the wood into interesting shapes like hexagons, triangles, or even whimsical clouds.
  • Branch-Inspired Designs: Embrace natural textures by incorporating real branches or twigs into the design, adding a touch of the outdoors.
  • Personalized Touches: Incorporate your initials, family names, or even a decorative house icon for a truly personal touch.

Craft with Purposeful Finishes

The finishing touches can truly elevate your wooden key rack from ordinary to extraordinary. Explore a range of options:

  • Natural Finish: Embrace the wood's natural beauty with a clear coat of sealant, allowing its grain patterns to shine through.
  • Stained Finish: Enhance the wood's color and texture with a rich stain, adding depth and warmth.
  • Painted Finish: Let your creativity flow with a vibrant paint color, creating a bold statement piece that reflects your personality.

Embrace the Joy of Functionality

Beyond aesthetics, ensure your key rack is practical and user-friendly. Consider:

  • Sturdy Hooks: Choose strong, durable hooks that can handle the weight of keys and keychains.
  • Convenient Placement: Position the key rack in a high-traffic area, ideally near the entryway, for easy access.
  • Additional Storage: Incorporate a small shelf or compartment for mail, sunglasses, or other small essentials.

By combining creative woodworking techniques with thoughtful design elements, you can craft a wooden key rack that's both functional and aesthetically pleasing. It's a project that's sure to impress, adding a unique touch to your home and showcasing your talent as a craftsperson.

Read More..

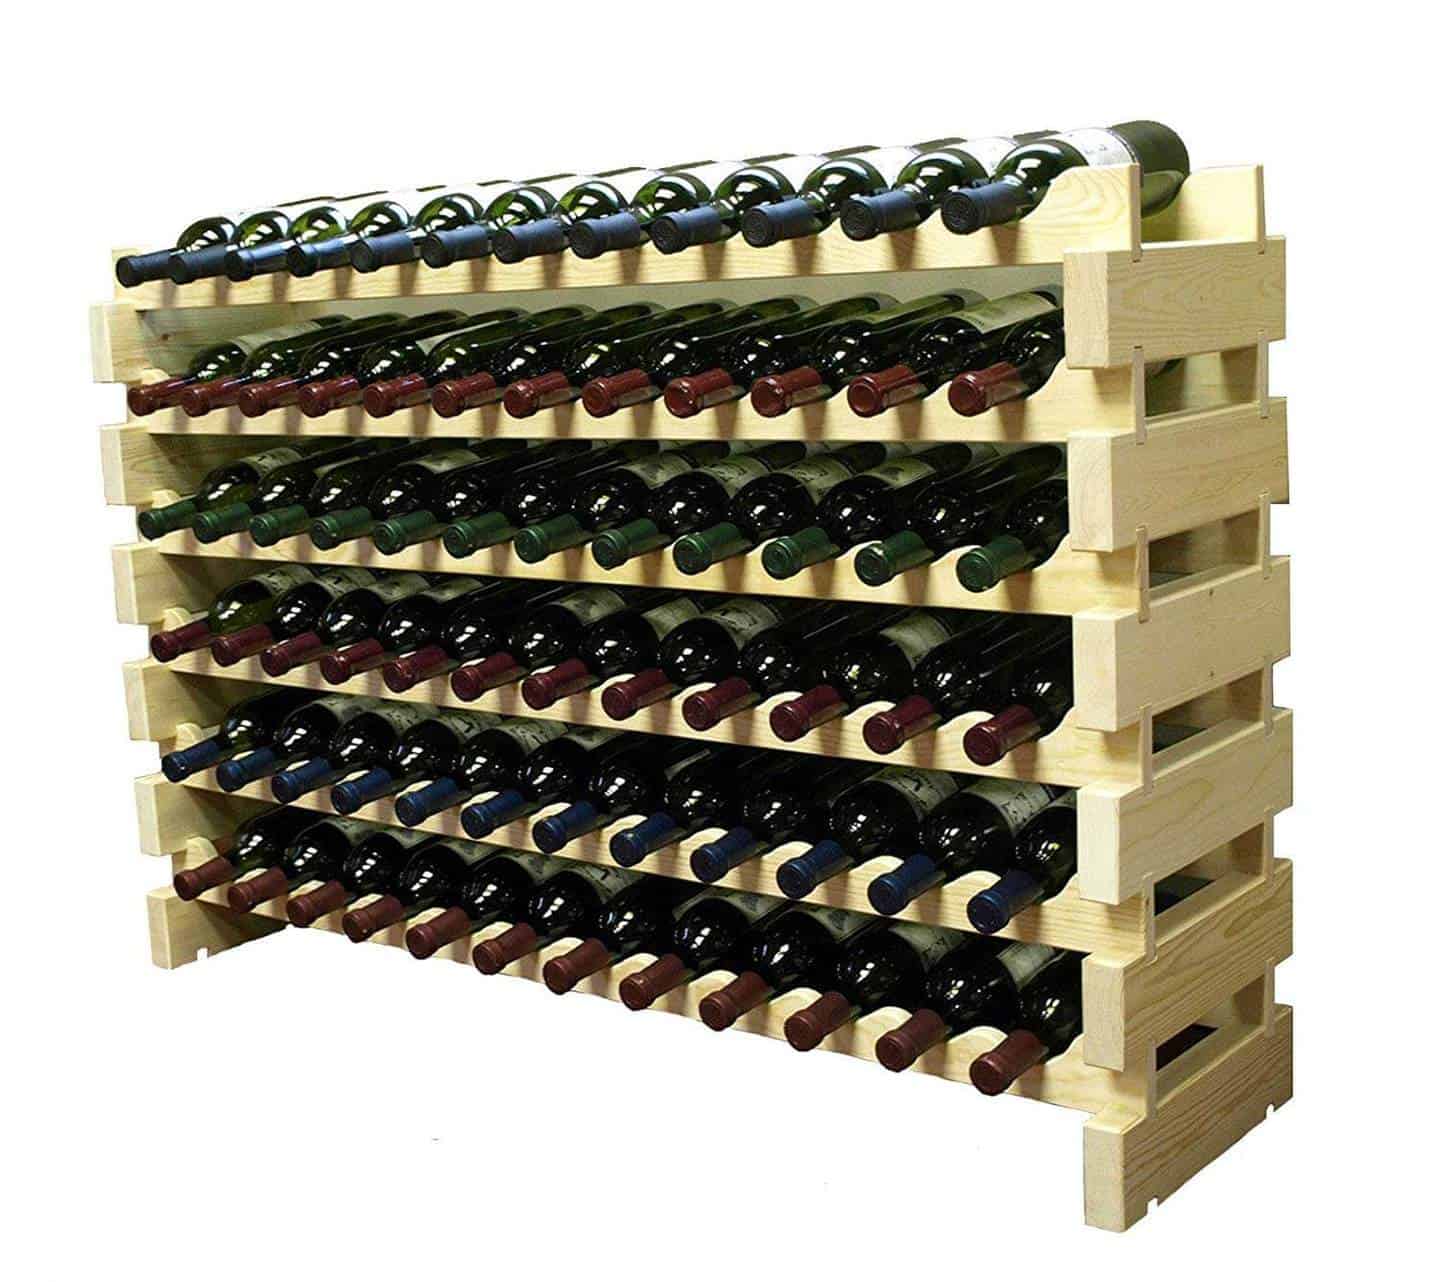
Wooden Wine Racks That Look Expensive but Are Easy to Build

Wooden Wine Racks That Look Expensive but Are Easy to Build

Wooden Wine Racks That Look Expensive but Are Easy to Build

Have you ever admired those sleek, stylish wine racks you see in magazines and home design blogs? They look luxurious and expensive, but you might be hesitant to invest in them. Don't worry! You can achieve that same sophisticated look without breaking the bank. Building your own wine rack is a rewarding and surprisingly simple project, and it’s a great way to add a touch of personalized charm to your home. In this guide, we'll walk you through creating a stunning wine rack that will impress your guests and elevate your home decor, all while keeping your budget in check.

Choosing the Right Wood

The wood you select plays a crucial role in both the aesthetics and the longevity of your wine rack. For a timeless and elegant feel, consider hardwoods like:

  • Oak: A classic choice known for its durability, rich grain patterns, and warm tones. Oak is a popular choice for wine racks because it stands up to wear and tear and adds a touch of rustic elegance.
  • Walnut: With its stunning dark brown hues and intricate grain patterns, walnut exudes sophistication and a touch of luxury. It's perfect for creating a refined and elegant look for your wine rack.
  • Cherry: Known for its reddish-brown tones and beautiful grain patterns, cherry wood adds a warm and inviting feel to your wine rack. It's a fantastic choice for those seeking a more traditional and elegant look.

If you prefer a more budget-friendly option, consider using pine, maple, or birch. These softer woods are easier to work with and readily available at most lumberyards. However, they may require a bit more attention to finishing and care to ensure durability.

Essential Tools and Materials

Before embarking on your wine rack building journey, gather these essential tools and materials:

  • Wood: Choose your preferred wood species and purchase the necessary dimensions for your rack.
  • Saw: A circular saw or a miter saw will help you accurately cut the wood to size.
  • Drill: A cordless drill with various drill bit sizes will be needed for creating holes and attaching the components.
  • Screwdriver: A Phillips-head screwdriver is a must-have for assembling the rack.
  • Sandpaper: Use different grits of sandpaper to smooth out the wood and create a consistent finish.
  • Wood glue: For bonding the wood pieces together.
  • Wood stain or paint (optional): To enhance the natural beauty of the wood or to add a pop of color.
  • Finish (optional): A polyurethane or varnish to protect the wood and provide a lasting sheen.
  • Measuring tape: For accurate measurements.
  • Level: To ensure your rack is perfectly straight.

Simple Wine Rack Designs

Here are a couple of simple wine rack designs that are perfect for beginners.

Classic Shelf Wine Rack

This design is straightforward and can be customized to accommodate different wine bottle sizes.

  1. Cut the wood: Start by cutting your wood to the desired dimensions. For example, you could cut two long pieces for the sides, two shorter pieces for the top and bottom shelves, and then cut pieces for additional shelves based on the height of your bottles.
  2. Assemble the shelves: Using wood glue and screws, secure the shelves to the sides. Be sure to keep the shelves level.
  3. Sand and finish: Once your rack is assembled, sand the entire surface to create a smooth finish. Then, apply a stain or paint if desired.
  4. Protect the wood: Apply a polyurethane or varnish to seal the wood and protect it from spills and scratches.

Vertical Wine Rack

A vertical wine rack offers a space-saving solution and adds visual interest to your wall.

  1. Cut the wood: You'll need to cut wooden slats or boards to create the vertical supports for your bottles.
  2. Secure the supports: Using screws and wood glue, attach the vertical slats to a base board.
  3. Add supports (optional): You may want to add additional horizontal supports for extra stability.
  4. Sand, stain, and finish: Smooth the rack with sandpaper, and then stain or paint the wood as desired. Apply a protective finish for durability.

Tips for Building a Wine Rack

Here are some additional tips to ensure your DIY wine rack turns out perfectly:

  • Plan your design: Before you start cutting wood, sketch out your wine rack design on paper. This will help you visualize the final product and calculate the necessary materials.
  • Use a saw guide: If you’re using a circular saw, use a guide to ensure precise cuts.
  • Pre-drill holes: Before driving screws into the wood, pre-drill holes slightly smaller than the screw size to prevent splitting.
  • Sand between coats: If you’re staining or painting the wood, sand between coats to create a smooth and even finish.
  • Let it dry: After applying glue, stain, or finish, allow it to dry completely before handling the rack.

Enjoying Your DIY Wine Rack

Building your own wine rack is a fulfilling project that will allow you to showcase your favorite bottles in style. You’ll have a unique piece of furniture that complements your decor and serves as a conversation starter. So, gather your tools, choose your wood, and unleash your creativity. You'll be surprised at how easy it is to build a stunning wine rack that will make your home feel even more inviting.

Read More..

Lawn Chair Projects with Custom Design Features for Extra Appeal

Lawn Chair Projects with Custom Design Features for Extra Appeal

Up Your Lawn Game: DIY Lawn Chair Projects with Custom Design Features

Tired of those boring, basic lawn chairs? Want to add a touch of personality and style to your outdoor space? Look no further than DIY lawn chair projects! You can transform those ordinary chairs into unique and eye-catching pieces with a little creativity and some simple materials. Let's dive into some inspiring ideas and unlock your inner DIYer!

Get Creative with Paint!

Painting is the simplest and most impactful way to revamp your lawn chairs. Unleash your artistic spirit and explore a world of colors and patterns. Here are a few fun ideas:

Rainbow Brights

Who says lawn chairs have to be boring? Go bold with a rainbow of colors! Pick your favorite hues and paint each chair with a different color for a vibrant and cheerful look. You can even paint each chair in stripes or gradients for extra flair.

Geometric Patterns

For a more modern and sophisticated look, try incorporating geometric patterns. Use painter's tape to create sharp lines and shapes. You can stick with simple geometric shapes or get creative with intricate designs. A combination of colors and textures can really elevate the look.

Faux Wood Finish

Love the look of wooden furniture but don't want to deal with the hassle of working with wood? No problem! Achieve a faux wood finish with paint and a little bit of technique. Use brown and white paint to create a realistic wood grain effect. You can even add a bit of glaze for an extra touch of depth.

Beyond Paint: Adding Texture and Dimension

Want to take your lawn chair projects to the next level? Try incorporating different textures and materials to add dimension and visual interest.

Rope Accents

Rope is a fantastic material to add a rustic and nautical feel. You can wrap rope around the arms or back of the chair, or even create a whole new seat using woven rope. The possibilities are endless!

Fabric Upholstery

Transform your lawn chair with a fresh fabric makeover! Choose a pattern or color that complements your outdoor space. You can use fabric glue or a staple gun to attach the fabric to the chair. Don't forget to add some extra padding for comfort!

Mosaic Tiles

For a bold statement, cover the seat or back of your chair with mosaic tiles. You can use broken pieces of ceramic tiles, glass tiles, or even pebbles. Use a strong adhesive to attach the tiles and grout for a polished finish.

Creative and Fun Design Features

Let's talk about those unique details that make your DIY projects stand out. Here are some fun and functional design features you can add:

Built-in Drink Holders

Say goodbye to wobbly drinks! Add built-in drink holders to your lawn chairs for a convenient and practical touch. Use PVC pipe, metal rings, or even wooden dowels to create your drink holders. You can attach them directly to the arms or create a separate tray for your drinks.

Backrest Storage

Keep your essentials within reach! Add a pocket or compartment to the back of your chair to hold your phone, book, or other necessities. Use fabric, leather, or even a repurposed canvas bag to create your storage solution. You can even add a zipper for secure closure.

Footrests

Elevate your relaxation! Add a footrest to your chair to maximize comfort. You can use wooden planks, metal bars, or even repurposed pieces of furniture to create your footrest. Attach it to the chair using hinges or simply place it directly beneath the chair.

Personal Touches

Add your personal stamp to your lawn chairs with unique embellishments. Here are a few ideas:

  • Add your initials or a monogram for a personalized touch.
  • Paint whimsical designs or quotes for a fun and quirky look.
  • Decorate your chairs with flowers, ribbons, or other festive elements.

Ready to Upcycle and Repurpose?

Don't throw away those old lawn chairs! Repurpose them into something new and exciting. Here are some creative ideas:

Transform into Garden Planters

Give your plants a stylish home! Turn your old chairs into planters by filling them with potting soil and your favorite plants. For a whimsical look, paint the chairs in bright colors or add decorative elements like floral designs.

Create a Unique Side Table

If you're in need of a side table for your outdoor space, repurpose your old chairs into stylish and functional pieces. Use wood, metal, or even fabric to create a tabletop surface and attach it to the chair frame. You can even add wheels for easy mobility.

Build a Cozy Outdoor Bed

For ultimate relaxation, combine several chairs to create a cozy outdoor bed. Use strong ropes or straps to attach the chairs together and add a comfortable mattress for a luxurious experience. You can even create a canopy with fabric for a more intimate setting.

Safety First: Tips for DIY Lawn Chair Projects

Before you start, remember to prioritize safety! Here are some tips to keep in mind:

  • Always wear safety glasses and gloves to protect yourself from injuries.
  • Use a well-ventilated area when working with paint or other potentially hazardous materials.
  • Make sure your chairs are stable and structurally sound before adding any design features.
  • If you're unsure about any steps, consult a professional or watch instructional videos to ensure you're working safely.

With a little imagination and effort, you can transform your ordinary lawn chairs into unique and eye-catching pieces that will make your outdoor space truly special. So get creative, have fun, and don't be afraid to experiment! You might just surprise yourself with the amazing results you achieve.

Read More..

Unforgettable Woodworking Gifts for the Holidays

Unforgettable Woodworking Gifts for the Holidays

Unforgettable Woodworking Gifts for the Holidays

The holiday season is a time for giving, and what better way to show your loved ones you care than with a thoughtful and personalized gift? For the woodworking enthusiast in your life, a gift that reflects their passion and creativity can be truly cherished. This year, go beyond the usual gift cards and consider something unique and handmade. Here are some unforgettable woodworking gifts that are sure to make their holiday brighter.

Tools and Supplies

Woodworkers are always looking for new tools and supplies to add to their collection, and a thoughtful gift in this category can be a game-changer. Here are some ideas:

High-Quality Hand Tools

A well-crafted hand tool is an investment that will last a lifetime. Consider a premium chisel set, a Japanese pull saw, or a finely crafted wood plane.

  • Chisel Set: A set of high-quality chisels is essential for any woodworker. Look for chisels made from hardened steel and with comfortable handles.
  • Japanese Pull Saw: Japanese pull saws are known for their sharpness and precision. They are great for making fine cuts and can be a valuable addition to any woodworking toolkit.
  • Wood Plane: A wood plane is a versatile tool that can be used to smooth wood, create bevels, and shape edges. Consider a hand plane or a block plane.

Power Tools

For the woodworker who enjoys power tools, a new tool can be a welcome addition. Consider a cordless drill/driver, a random orbital sander, or a jigsaw.

  • Cordless Drill/Driver: A cordless drill/driver is a must-have for any woodworker. Look for a model with a powerful motor and a long battery life.
  • Random Orbital Sander: A random orbital sander is great for smoothing and finishing wood. Look for a sander with a variety of sanding discs and a dust collection system.
  • Jigsaw: A jigsaw is a versatile tool that can be used to cut intricate shapes and curves in wood. Look for a jigsaw with a variable speed setting and a blade change system.

Specialty Woodworking Supplies

Beyond the basics, there are many specialized woodworking supplies that can be appreciated by even the most experienced woodworker. Consider a set of high-quality woodturning tools, a set of carving chisels, or a premium wood finishing kit.

  • Woodturning Tools: If your woodworking enthusiast enjoys turning, a set of high-quality woodturning tools can be a great gift. Look for a set that includes a variety of gouges, chisels, and scrapers.
  • Carving Chisels: For woodcarving enthusiasts, a set of carving chisels can be a valuable addition to their toolkit. Look for chisels made from high-carbon steel with comfortable handles.
  • Wood Finishing Kit: A premium wood finishing kit can help woodworkers achieve stunning results. Look for a kit that includes a variety of stains, finishes, and applicators.

Personalized Woodworking Gifts

For a truly unique and memorable gift, consider something personalized that reflects the woodworker's individual style and interests. Here are some ideas:

Custom Engraved Tools

Add a personal touch to their favorite tools by having them engraved with their name, initials, or a special message.

Personalized Workshop Sign

Create a custom workshop sign with their name, a meaningful quote, or a design that reflects their woodworking style. You can even include a special message about their woodworking journey.

Customized Woodworking Apron

A personalized woodworking apron can be both practical and stylish. You can have it engraved with their name, initials, or a design that reflects their woodworking style.

Wooden Toolbox or Tool Caddy

A well-crafted wooden toolbox or tool caddy can be a practical and beautiful addition to any woodworker's workspace. You can customize it by adding a personal touch with an engraved name or inscription.

Experiences and Classes

For the woodworker who is always looking to learn and grow, an experience or a class can be a wonderful gift. Here are some ideas:

Woodworking Class or Workshop

A woodworking class or workshop can provide them with new skills and techniques. There are classes available in a wide range of woodworking styles, from basic carpentry to advanced furniture making.

Visit to a Woodworking Show or Exhibition

A trip to a woodworking show or exhibition can provide them with inspiration and exposure to new tools, techniques, and materials.

Membership to a Woodworking Club or Association

A membership to a woodworking club or association can provide them with access to a community of like-minded individuals, shared resources, and educational opportunities.

Handmade Woodworking Gifts

If you have the skills and time, you can create a truly special and unforgettable gift by making something yourself. Here are some ideas:

Wooden Cutting Board

A beautifully crafted wooden cutting board is a practical and timeless gift. Choose a high-quality wood like walnut, cherry, or maple, and personalize it with a custom design or engraving.

Wooden Serving Tray

A wooden serving tray is a versatile and elegant gift that can be used for everything from serving drinks and snacks to displaying decorative items. You can create a custom design to reflect the recipient's style.

Wooden Jewelry Box

A wooden jewelry box is a beautiful and practical gift for a woman in your life. You can personalize it with a decorative design, an engraved inscription, or a special finish.

Wooden Picture Frame

A wooden picture frame is a simple yet meaningful gift that can be personalized with a custom design, an engraved message, or a special wood finish.

Remember, a woodworking gift doesn't have to be expensive to be meaningful. It's the thoughtfulness and personal touch that will make it truly unforgettable. Happy holidays!

Read More..

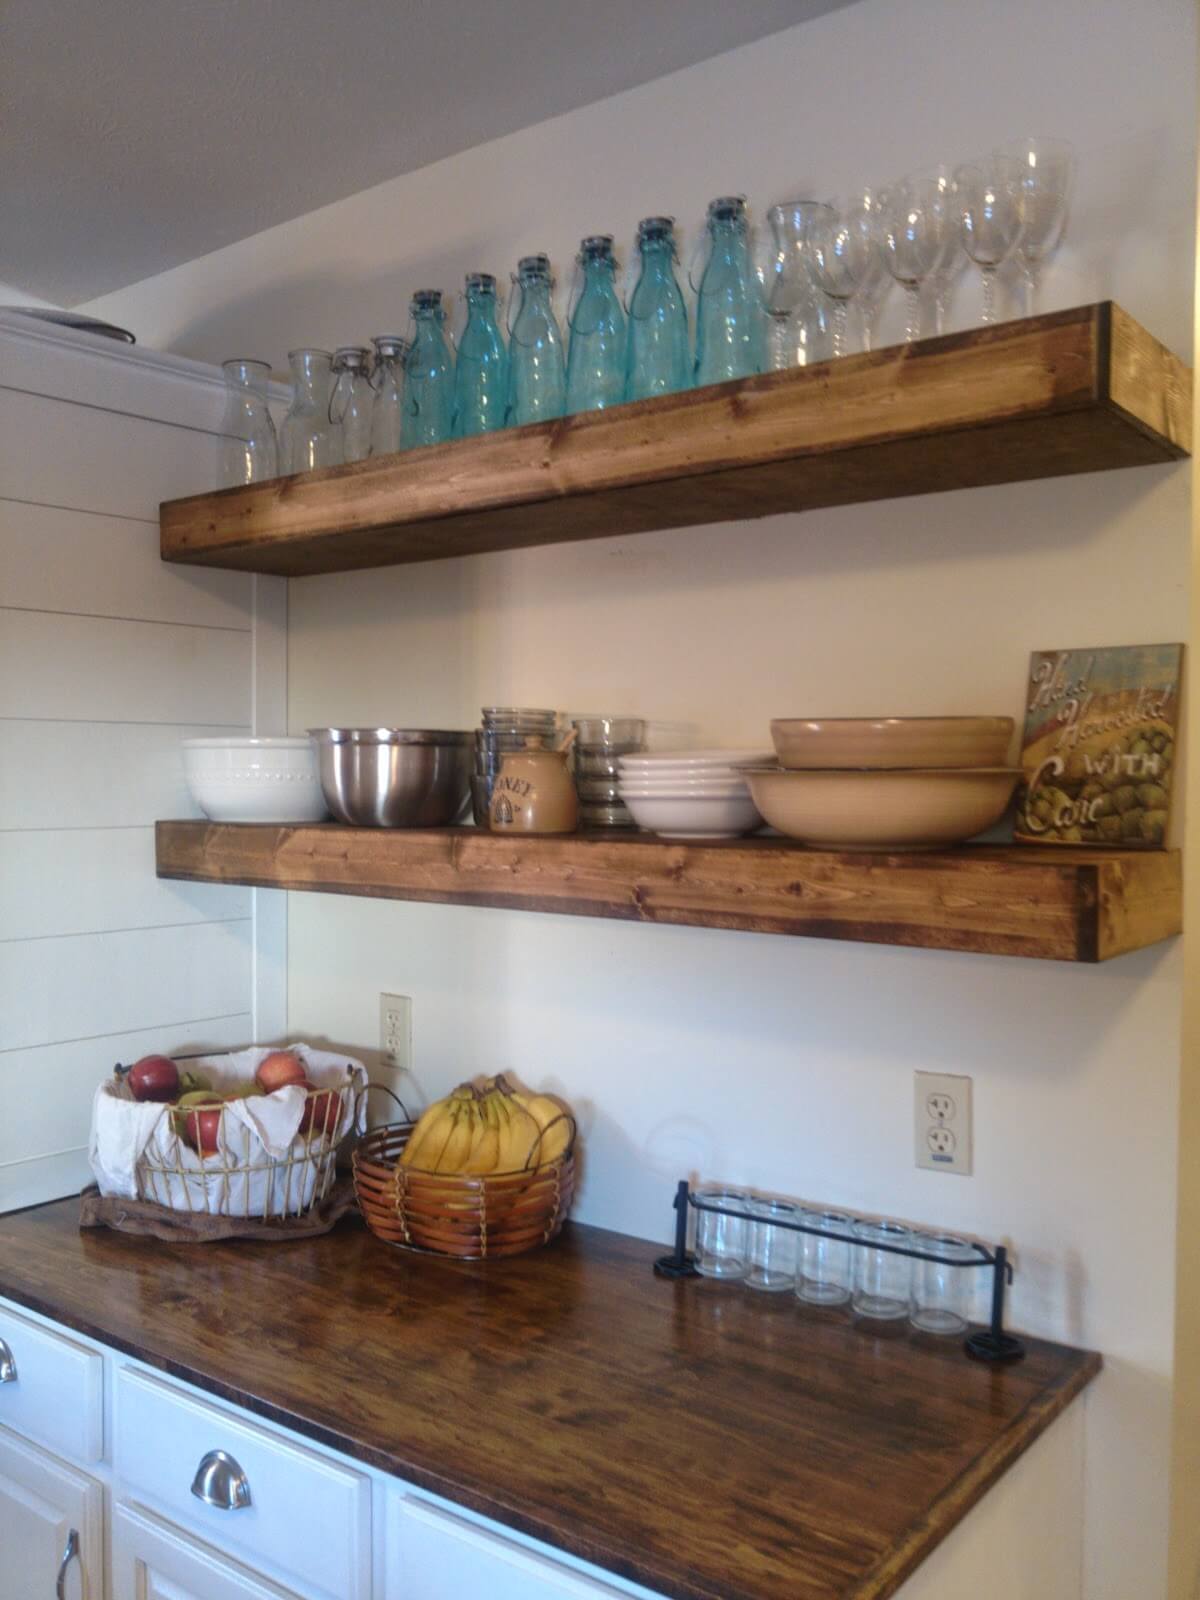
Wood Floating Shelves for Your Bedroom: Design Tips

Wood Floating Shelves for Your Bedroom: Design Tips

Wood Floating Shelves for Your Bedroom: Design Tips

Floating shelves offer a stylish and functional solution for organizing your bedroom. Made from wood, they bring warmth and a natural touch to any space. With careful planning and design, you can create a personalized and beautiful storage solution that enhances your bedroom's aesthetic appeal and functionality. Here are some design tips to guide you in creating the perfect wood floating shelves for your bedroom:

Choosing the Right Wood

The type of wood you choose will significantly impact the look and feel of your shelves. Consider the following factors:

Species and Grain Pattern

  • Oak: Strong, durable, and with a distinctive grain pattern, oak is a popular choice for floating shelves.
  • Maple: Known for its smooth, light-colored grain, maple adds a touch of elegance and sophistication.
  • Walnut: Offers rich, dark tones and intricate grain patterns, adding a touch of luxury and warmth.
  • Cherry: Has a reddish-brown hue that deepens with age, creating a timeless and elegant look.

Color and Finish

  • Natural Finish: Emphasizes the wood's natural grain and texture, creating a rustic and organic feel.
  • Stained Finish: Allows you to customize the color of your shelves, matching them to your existing furniture or desired aesthetic.
  • Painted Finish: Offers endless color possibilities, letting you create a bold statement or a subtle touch of color.

Determining Shelf Size and Placement

Consider the dimensions of your bedroom and the items you plan to store on the shelves to determine the optimal size and placement.

Shelf Size

  • Wide Shelves: Ideal for showcasing larger items like books, plants, or decorative pieces.
  • Narrow Shelves: Perfect for smaller items like photos, candles, or trinkets.

Shelf Placement

  • Above the Bed: A great spot for reading materials, alarm clocks, or nightlights.
  • By the Window: Ideal for showcasing plants or displaying decorative items.
  • On a Wall with Limited Space: A space-saving solution for displaying smaller items or adding a decorative touch.

Optimizing Functionality

Consider the functionality of the shelves and how you can maximize their usefulness.

Shelf Depth

  • Deep Shelves: Provide ample storage space for books, framed photos, or other larger items.
  • Shallow Shelves: Ideal for displaying smaller items or creating a minimalist look.

Additional Features

  • Hidden Storage: Incorporate drawers or compartments behind the shelves to create concealed storage.
  • Lighting: Add under-shelf lighting to highlight your display items and create a warm ambiance.
  • Accessories: Utilize baskets, trays, or decorative boxes to add visual interest and enhance organization.

Creating a Balanced and Harmonious Design

Strive for a balanced and harmonious design by considering the following factors:

Number of Shelves

  • Odd Numbers: Create a visually appealing and balanced arrangement.
  • Even Numbers: Can also work effectively, but consider the spacing and layout for optimal aesthetics.

Spacing

  • Consistent Spacing: Creates a clean and organized look.
  • Varied Spacing: Adds visual interest and dynamism.

Symmetry and Asymmetry

  • Symmetrical Design: Provides a sense of order and balance.
  • Asymmetrical Design: Adds a touch of originality and visual intrigue.

Enhancing the Aesthetics

Enhance the aesthetic appeal of your wood floating shelves with the following design elements:

Edge Detailing

  • Rounded Edges: Create a softer and more welcoming look.
  • Beveled Edges: Add a touch of sophistication and visual interest.
  • Straight Edges: Offer a clean and minimalist aesthetic.

Decorative Brackets

  • Metal Brackets: Add a contemporary and industrial touch.
  • Wooden Brackets: Blend seamlessly with the shelves, creating a cohesive and natural look.
  • Ornamental Brackets: Add a touch of elegance and decorative detail.

Conclusion

Wood floating shelves are a versatile and stylish addition to any bedroom. By carefully considering factors such as wood type, shelf size, placement, functionality, and aesthetics, you can create a personalized and beautiful storage solution that enhances your bedroom's charm and functionality. With a bit of planning and creativity, you can transform your bedroom into a haven of style and organization.

Read More..

Festive Woodworking Gifts: Celebrate with Handcrafted Cheer

Festive Woodworking Gifts: Celebrate with Handcrafted Cheer

Festive Woodworking Gifts: Celebrate with Handcrafted Cheer

As the air turns crisp and the scent of pine fills the air, the holiday season is upon us. This year, why not embrace the warmth and tradition of woodworking to create heartfelt gifts that will be treasured for years to come? From elegant ornaments to practical kitchen tools, your handcrafted creations will bring joy to loved ones and add a touch of personal magic to their celebrations.

Spreading Holiday Cheer with Woodworking

The beauty of woodworking lies in its versatility. You can transform simple pieces of wood into cherished keepsakes that express your love and appreciation. Whether you're a seasoned woodworker or a curious beginner, there's a festive project waiting to be brought to life. Imagine the delight on your loved ones' faces as they unwrap a personalized wooden ornament, a beautifully crafted serving tray, or a set of stylish coasters.

Unleashing Creativity with Festive Projects

The holiday season offers a wealth of inspiration for woodworking projects. Embrace the spirit of giving with these heartwarming ideas:

Personalized Ornaments

Create unique and sentimental ornaments by engraving names, dates, or special messages onto wooden shapes. You can use a laser engraver, a wood burning tool, or even hand-carve delicate details for a truly personalized touch. Add a touch of whimsy by incorporating festive shapes like snowflakes, reindeer, or Santa Claus.

Rustic Serving Trays

Embrace the warmth of wood with handcrafted serving trays. Choose a beautiful wood grain, finish it with a natural oil or stain, and personalize it with a festive message or a charming holiday design. These trays are perfect for serving snacks, drinks, and even holiday treats.

Cozy Wooden Coasters

Create practical and stylish coasters to protect furniture from hot beverages. Use different wood species to create unique patterns or incorporate festive themes by adding holiday-themed inlays or engravings. These coasters make an excellent gift for those who appreciate the beauty of natural materials.

Wooden Toys for Little Ones

Bring joy to the littlest members of your family with handcrafted wooden toys. From classic wooden blocks to whimsical puzzles, your creations will provide hours of imaginative play and stand the test of time. Consider using non-toxic paints and finishes to ensure the safety of young children.

Tips for Festive Woodworking Success

As you embark on your woodworking journey, keep these tips in mind for a successful and enjoyable experience:

  • Plan Ahead: Carefully consider the design, materials, and tools needed for your chosen project.
  • Safety First: Always wear safety glasses and use appropriate protective gear.
  • Practice Makes Perfect: Start with simple projects to hone your skills before tackling more complex designs.
  • Finishing Touches: Use high-quality finishes to protect your woodworking and enhance its beauty.
  • Presentation Matters: Wrap your gifts beautifully and add a personal touch with a handwritten note or a festive ribbon.

Embrace the joy of giving this holiday season by creating heartfelt woodworking gifts that will be cherished for years to come. From personalized ornaments to practical kitchen tools, your handcrafted creations will bring warmth, tradition, and a touch of magic to every celebration.

Read More..

Step-by-Step Guide to Squirrel Box Construction

Step-by-Step Guide to Squirrel Box Construction

Building a Squirrel Box: Your Guide to a Tiny Home for Your Bushy-Tailed Friend

So you've got squirrels scampering around your yard, and you want to make them feel welcome. Building a squirrel box is a great way to offer them a safe haven, especially during the cold winter months. Not only is it a rewarding project, but it's also a fun way to connect with nature and watch these little acrobats go about their daily lives. Let's dive into the details!

Materials You'll Need

Before you start hammering, you'll need to gather the right materials. Here's a list to get you going:

  • Wood: 1x6 inch boards (pine or cedar are good choices), 1x4 inch boards, 1/2 inch plywood.
  • Screws: 2-inch and 1-inch wood screws.
  • Nails: 8d or 10d finishing nails.
  • Waterproof sealant: To protect the wood from the elements.
  • Metal flashing: To protect the edges of the roof from water damage.
  • Optional: A bird feeder (for attracting squirrels) or a squirrel baffle (to keep pesky raccoons away).

Pro tip: When choosing wood, go for untreated options that are free from chemicals. Squirrels are delicate creatures, and we want to keep their little bodies healthy!

Time to Build!

Step 1: The Foundation

Let's start with the base of your squirrel box. You'll need two pieces of 1x6-inch wood, each measuring about 12 inches long. Join them together to form a rectangle. This will be the bottom of your box. You can use screws or nails for this, but make sure they're long enough to go all the way through the wood and secure the pieces firmly.

Step 2: Building the Walls

Now, let's construct the walls. Cut four pieces of 1x6-inch wood to a length of 10 inches each. These will be the side walls of your squirrel box. Attach these pieces to the base, creating a rectangle with one open side. Again, use screws or nails to secure them tightly.

Step 3: The Back Wall

Next, cut another piece of 1x6-inch wood to a length of 12 inches. This will be the back wall of your box. Attach this to the open end of the side walls, completing the rectangle. Make sure it's lined up with the bottom piece for a nice, sturdy box.

Step 4: The Roof

To make the roof, you'll need two pieces of 1x6-inch wood, each 13 inches long. Cut a piece of plywood to create a triangle shape that fits the top of the box. This will be the roof's support. Place the support triangle on top of the box, and attach the two pieces of 1x6-inch wood to the sides of the triangle, forming a slanted roof. Secure these pieces to the sides of the box with screws or nails.

Step 5: The Entrance

Now, let's make a cozy entrance for your squirrel friends. Cut a 4-inch square hole in one of the side walls of your box, about 3-4 inches from the top. You can use a jigsaw or a drill and chisel for this. This hole will be the entrance to your squirrel box.

Step 6: Strengthening the Roof

To make sure the roof stays in place, let's add some extra support. Cut a 1x4-inch piece of wood to the length of the front of the roof. Attach this piece to the inside of the roof, creating a sturdy support beam.

Step 7: Finishing Touches

Your squirrel box is almost ready for its new tenant! Now's the time to add some finishing touches.
1. **Waterproof the wood:** Apply a layer of waterproof sealant to all exterior surfaces of the box to protect it from rain and moisture.
2. **Install metal flashing:** This will prevent water from seeping under the roof. Cut two pieces of metal flashing to fit the edges of the roof and attach them with nails or screws.
3. **Optional: Add a bird feeder or squirrel baffle:** If you want to attract squirrels to your box, you can place a bird feeder nearby. To keep raccoons out, consider adding a squirrel baffle to the feeder.

Placing Your Squirrel Box

Now that your squirrel box is ready, let's find it a perfect spot in your yard. Here are some tips:

  • Choose a location that's close to trees. Squirrels prefer to have a safe escape route if they feel threatened.
  • Mount the box about 8-10 feet off the ground. This will help protect it from predators like cats and raccoons.
  • Make sure the box is facing away from strong winds and heavy rain.
  • Place the box in a shady area, especially during the hottest months of summer. This will prevent it from overheating.

Caring for Your Squirrel Box

Once your squirrel box is in place, you'll need to do some maintenance to keep it in good shape. Here are some tips:

  • Clean it out regularly: Remove any debris or droppings from the box to prevent the spread of diseases. Do this at least once a year, or more often if needed.
  • Check for damage: Inspect the box regularly for any signs of damage, like cracked wood or loose screws. Repair any damage promptly to keep your squirrels safe.
  • Provide fresh bedding: Squirrels appreciate a clean and comfortable home. You can provide them with a layer of shredded paper, straw, or pine needles as bedding.

Enjoy Watching Your New Residents!

Now, all that's left is to sit back and watch as your new furry friends enjoy their cozy home. Be patient, it may take some time for squirrels to discover and settle in. Once they do, you'll be rewarded with the delightful sight of these adorable creatures scampering and playing around your yard.

Building a squirrel box is a fun and rewarding project that can bring a touch of wildness to your backyard. So grab your tools, get creative, and get ready to welcome some furry friends to your yard! Happy building!

Read More..

Ultimate Guide to Squirrel Box Plans: Build Your Own

Ultimate Guide to Squirrel Box Plans: Build Your Own

The Ultimate Guide to Squirrel Box Plans: Build Your Own

Are you tired of squirrels raiding your bird feeders? Do you want to provide a safe and cozy home for these playful creatures? Building your own squirrel box is a rewarding project that will bring joy to you and the local squirrel population. This guide provides a comprehensive overview of everything you need to know, from choosing the right materials to installing your finished masterpiece.

Choosing the Right Materials

The materials you choose for your squirrel box will determine its longevity and appeal to the squirrels. Here's a breakdown of essential elements and suitable options:

Wood

Use untreated, rot-resistant wood like cedar, redwood, or pressure-treated pine. These woods are durable and weather-resistant, ensuring your box lasts for years. Avoid using plywood or particleboard, as they are susceptible to moisture damage.

Hardware

Choose rust-resistant screws and nails. Use galvanized or stainless steel options for maximum durability.

Roofing

A durable roof will protect your box from rain and snow. Consider using asphalt shingles, metal roofing, or even a thick layer of plywood sealed with waterproof paint.

Squirrel Box Design

The ideal squirrel box design varies depending on your location and the type of squirrel you wish to attract. Here are some essential considerations:

Size

A standard squirrel box should be roughly 12" wide x 12" deep x 18" high. This size provides ample space for a family of squirrels while remaining compact and easy to build.

Entry Hole

Place the entry hole on the side or front of the box, approximately 3" above the floor. The hole should be 4-5" in diameter, allowing adult squirrels to enter and exit comfortably.

Ventilation

Ensure adequate ventilation within the box by drilling small holes on the sides or back of the box. These holes allow air circulation and prevent moisture buildup.

Interior Design

The interior of the box should be smooth and free of sharp edges. You can add a nesting platform or shelf for added comfort. If you want to discourage birds from nesting in the box, consider adding a baffle below the entry hole.

Building Your Squirrel Box

Once you have gathered your materials and finalized your design, it's time to start building! Here's a step-by-step guide:

Step 1: Cut the Wood

Cut the wood to the desired dimensions using a saw. Ensure your cuts are precise for a sturdy and aesthetically pleasing box.

Step 2: Assemble the Box

Assemble the box using screws or nails. Start with the floor, then add the sides and back. Use wood glue for extra strength.

Step 3: Add the Entry Hole

Cut the entry hole in the desired location using a jigsaw or drill. Smooth the edges to prevent injury to the squirrels.

Step 4: Install the Roof

Attach the roof to the box using hinges or a simple overhang design. Ensure the roof overlaps the sides of the box for maximum water resistance.

Step 5: Add Ventilation

Drill small ventilation holes on the sides or back of the box to ensure proper airflow.

Step 6: Finish and Install

Sand the exterior of the box to create a smooth finish. Apply a sealant or paint to protect the wood from weathering. Install the box on a tree trunk or post, at least 10 feet off the ground.

Tips for Attracting Squirrels

Once your squirrel box is built and installed, here are some tips to attract these furry friends:

  • Place the box in a location with ample shade and shelter from the elements.
  • Provide a source of food nearby, such as a bird feeder or a squirrel feeder.
  • Keep the box clean and free of debris.
  • Be patient, it may take some time for squirrels to discover your box.
  • Enjoy Your New Squirrel Habitat

    Building your own squirrel box is a fun and rewarding project that allows you to connect with nature and provide a haven for these fascinating creatures. As you watch squirrels move into their new home, you'll experience the satisfaction of creating a safe and comfortable sanctuary for these playful and intelligent animals.

    Read More..

    Cold Frame Plans: Beginner's Guide

    Cold Frame Plans: Beginner's Guide

    Cold Frame Plans: A Beginner's Guide to Building Your Own

    A cold frame is a simple, yet effective, structure that can extend your gardening season, providing a safe haven for seedlings, protecting tender plants from frost, and offering a head start on spring planting. With a cold frame, you can enjoy fresh produce and vibrant flowers earlier in the year and longer into the fall. Building your own cold frame is a rewarding DIY project that can be accomplished with readily available materials and basic carpentry skills. This comprehensive guide will walk you through the process, step-by-step, making it a breeze for even the most novice builder.

    Understanding Cold Frames

    Cold frames are essentially miniature greenhouses, typically constructed from a transparent top (like glass or plastic) that sits atop a wooden or concrete frame. The transparent top allows sunlight to penetrate, while the frame acts as an insulator, trapping heat and creating a microclimate that is warmer than the surrounding air. This microclimate is ideal for protecting plants from the elements, especially during colder months.

    Cold frames work on the principle of passive solar heating. Sunlight warms the air inside the frame, which in turn warms the soil and plants. The glass or plastic top prevents heat loss, creating a mini greenhouse effect. This process allows you to start seeds indoors and transplant them to the cold frame for hardening off, or to protect established plants during the colder months.

    Benefits of Using a Cold Frame

    Investing in a cold frame offers a multitude of advantages for any gardener, from novice to expert:

    • Extended Growing Season: By protecting plants from frost and cold temperatures, cold frames allow you to enjoy fresh produce and flowers earlier in the spring and later in the fall.
    • Seed Starting: Cold frames provide the ideal environment for starting seeds indoors, offering a controlled setting for germination and seedling development.
    • Hardening Off: Once seedlings have established themselves, they can be transitioned to a cold frame to acclimatize them to the outdoor environment before being transplanted to the garden.
    • Overwintering Tender Plants: Cold frames can protect sensitive plants from freezing temperatures during the winter, allowing you to extend their lifespan.
    • Soil Warming: By trapping solar heat, cold frames can warm the soil, facilitating earlier planting and faster growth.
    • Pest Control: The enclosed environment of a cold frame can help deter some pests and diseases.
    • Cost-Effective: Building a cold frame is a cost-effective way to enhance your gardening endeavors, utilizing readily available materials and simple construction techniques.

    Choosing the Right Cold Frame Design

    The design of your cold frame will depend on your needs, space, and aesthetic preferences. There are several common types of cold frames:

    • Lean-to Cold Frame: This design utilizes a sloping top against a wall or fence, maximizing sunlight exposure and providing a more compact structure.
    • Freestanding Cold Frame: These are self-supporting structures with a box-like design, offering flexibility in placement and allowing for ventilation.
    • Portable Cold Frame: These small, movable cold frames are ideal for protecting smaller plants or starting seeds. They can be easily relocated to maximize sunlight exposure or provide additional protection as needed.
    • Raised Cold Frame: This design elevates the frame above ground level, making it easier to access and providing better drainage.

    Materials Needed for Cold Frame Construction

    Before embarking on your cold frame building project, gather the necessary materials. The following list outlines the essential items for a basic cold frame:

    • Wood: Choose pressure-treated lumber for the frame, as it resists rot and decay. Cedar, redwood, and pine are also good options.
    • Glass or Plastic: These materials will form the transparent top of the cold frame, allowing sunlight to penetrate while creating a greenhouse effect. Glass is more durable and provides better insulation, while plastic is lighter and more affordable. You can use polycarbonate panels, glass panes, or even recycled windows.
    • Fasteners: Use screws or nails to secure the frame components. Galvanized or stainless steel fasteners offer superior rust resistance.
    • Hinges: To create a hinged lid for the cold frame, you will need hinges. Heavy-duty hinges are recommended to ensure durability.
    • Handles: For ease of access, install handles on the lid to make it easy to lift and open.
    • Sealant: A weather-resistant sealant will help prevent drafts and moisture penetration.
    • Tools: You will need basic woodworking tools, such as a saw, drill, screwdriver, hammer, and level.

    Step-by-Step Instructions for Building a Cold Frame

    Now that you have gathered your materials and tools, let's begin construction:

    Step 1: Determine Dimensions and Design

    Plan the size and shape of your cold frame to fit your needs and available space. Consider the following factors:

    • Size: Choose a size that is appropriate for the plants you intend to grow. A standard cold frame can range from 3 to 6 feet wide and 4 to 6 feet long.
    • Shape: Most cold frames are rectangular or square, but you can opt for a more curved or arched design if desired.
    • Height: The height should be sufficient to allow for plant growth and easy access. A height of 2 to 3 feet is generally ideal.
    • Orientation: Position the cold frame so it receives maximum sunlight exposure, ideally with the longest side facing south.

    Step 2: Cut and Assemble the Frame

    Using your chosen wood, cut the frame components according to your plan. Ensure that all the cuts are accurate and square. Use a level to ensure the frame is plumb and square as you assemble it. Attach the frame pieces using screws or nails.

    Step 3: Construct the Lid

    Create a frame for the lid that will fit snugly on top of the base frame. Cut and assemble the lid frame using the same techniques as the base. If using glass, attach a wood frame to the underside of the lid to secure the panes. If using polycarbonate or other plastic, you may be able to directly attach the material to the lid frame.

    Step 4: Install the Hinges and Handle

    Attach hinges to the lid frame and the base frame, ensuring that they are securely fastened. Install a handle on the lid for easy lifting and opening. To ensure smooth opening and closing, lubricate the hinges with a light oil or grease.

    Step 5: Attach the Lid Material

    Secure the glass, polycarbonate, or other chosen material to the lid frame. Use a sealant to create a tight seal around the edges of the lid material. Make sure the material is securely attached and can withstand weather conditions.

    Step 6: Add Ventilation

    Create ventilation openings in the lid for airflow. This is essential to prevent overheating and to allow moisture to escape. You can use a simple wood frame with a hinged flap or purchase pre-made ventilation panels. Position the ventilation openings strategically to promote airflow.

    Step 7: Paint or Stain the Frame

    Optionally, paint or stain the frame to enhance its appearance and protect the wood from the elements. Choose a paint or stain that is suitable for outdoor use and will resist fading and weathering. Apply the paint or stain in thin, even coats, allowing each coat to dry completely before applying the next.

    Step 8: Position the Cold Frame

    Choose a suitable location for your cold frame, ensuring it receives maximum sunlight exposure. The cold frame should be positioned on level ground, or you may need to adjust the legs to create a level surface.

    Step 9: Fill the Cold Frame with Soil

    Fill the cold frame with a quality potting mix or soil. You may want to incorporate a layer of compost or other organic matter for added nutrients and drainage. The soil level should be a few inches below the top edge of the frame.

    Tips for Using a Cold Frame

    Once your cold frame is built, here are some helpful tips for maximizing its effectiveness:

    • Sunlight: Ensure your cold frame is positioned to receive adequate sunlight throughout the day. If your cold frame faces north, you might consider adding a reflective surface to bounce light onto the plants.
    • Ventilation: Provide adequate ventilation to prevent overheating. Open the lid or vents on warm days, and close them in the evening or during colder periods.
    • Watering: Monitor the moisture levels in your cold frame and water as needed. The soil should be kept consistently moist but not waterlogged.
    • Weeding: Regularly check for weeds and remove them promptly. They can compete with your plants for nutrients and space.
    • Monitoring Temperatures: Keep an eye on the temperature inside the cold frame, especially during extreme weather conditions. You can use a simple thermometer to monitor the temperature.
    • Protection: In areas with heavy snowfall, protect the cold frame lid from the weight of snow. You can use a layer of burlap or a snow frame to prevent damage.

    Conclusion

    Building your own cold frame is a rewarding project that can significantly enhance your gardening experience. With its ability to extend your growing season, protect plants from frost, and provide a controlled environment for seedling development, a cold frame is an invaluable asset for any gardener. By following these step-by-step instructions and using the provided tips, you can confidently construct your own cold frame and enjoy the benefits of this versatile and cost-effective gardening tool.

    Read More..

    Wooden clock projects for beginner woodworkers

    Wooden clock projects for beginner woodworkers

    Embark on Your Woodworking Journey: Beginner-Friendly Clock Projects

    The rhythmic tick-tock of a clock adds a touch of warmth and nostalgia to any space. Crafting a clock from scratch can be a rewarding and fulfilling woodworking project, even for beginners. Whether you're a novice woodworker or simply seeking a fun and functional project, these beginner-friendly clock projects are sure to ignite your creativity and inspire you to embark on your woodworking journey.

    Simple and Stylish: The Wall Clock

    A wall clock is a classic and practical choice for beginners, offering a perfect introduction to basic woodworking techniques. The design can be as simple or elaborate as you desire, making it a versatile project for various skill levels.

    Materials and Tools

    To create a basic wall clock, you will need:

    • Wood (plywood, MDF, or hardwood)
    • Clock movement kit (includes hands, mechanism, and a shaft)
    • Saw (hand saw or jigsaw)
    • Drill with drill bits
    • Sandpaper (various grits)
    • Wood glue
    • Clamps
    • Finishing materials (stain, paint, or varnish)
    • Clock hands

    Construction Steps

    1. Design and Cut the Clock Face: Sketch your desired clock face shape on the wood and use a saw to carefully cut it out. Ensure the shape is large enough to accommodate the clock movement and hands.
    2. Prepare the Clock Movement Hole: Locate the center of the clock face and use a drill to create a hole for the clock movement shaft. The diameter of the hole should match the shaft size.
    3. Attach the Clock Movement: Secure the clock movement to the back of the clock face using screws or glue. Ensure the hands can move freely.
    4. Sand and Finish: Smooth out any rough edges and sand the entire clock face using sandpaper. Apply a coat of stain, paint, or varnish to enhance the appearance and protect the wood.
    5. Attach the Hands: Once the finish has dried, attach the clock hands to the clock movement shaft.
    6. Install and Enjoy: Hang your newly crafted wall clock on a prominent wall and enjoy the satisfying tick-tock of your creation.

    Rustic Charm: The Wooden Pallet Clock

    Upcycling wooden pallets into a functional clock adds a touch of rustic charm to your home decor. This project is environmentally friendly and allows you to repurpose materials into a unique piece of art.

    Materials and Tools

    • Wooden pallet (ensure it is treated and safe for indoor use)
    • Clock movement kit
    • Saw (hand saw or jigsaw)
    • Drill with drill bits
    • Sandpaper (various grits)
    • Wood glue
    • Clamps
    • Finishing materials (stain, paint, or varnish)
    • Clock hands

    Construction Steps

    1. Prepare the Pallet: Remove any nails, staples, or debris from the pallet. Sand the surface to create a smooth finish.
    2. Cut the Clock Face: Cut out a circular or square section from the pallet to form the clock face. Use a jigsaw or hand saw for precise cuts.
    3. Prepare the Clock Movement Hole: Drill a hole in the center of the clock face for the clock movement shaft.
    4. Attach the Clock Movement: Secure the clock movement to the back of the clock face using screws or glue.
    5. Sand and Finish: Sand the clock face to smooth out any rough edges. Apply a coat of stain, paint, or varnish to enhance the rustic appearance.
    6. Attach the Hands: Once the finish has dried, attach the clock hands to the clock movement shaft.
    7. Install and Display: Hang or stand your rustic pallet clock in a prominent location to enjoy its unique charm.

    Timeless Elegance: The Grandfather Clock

    For a more ambitious project, consider building a grandfather clock. This iconic piece of furniture adds a touch of timeless elegance and sophistication to any home.

    Materials and Tools

    • Hardwood (oak, cherry, or mahogany)
    • Clock movement kit (specifically designed for grandfather clocks)
    • Saw (table saw, miter saw, or jigsaw)
    • Router
    • Drill with drill bits
    • Sandpaper (various grits)
    • Wood glue
    • Clamps
    • Finishing materials (stain, paint, or varnish)
    • Clock hands
    • Hardware (hinges, handles, etc.)

    Construction Steps

    Building a grandfather clock requires a comprehensive plan and meticulous execution. Consider using detailed plans or kits to guide your construction.

    1. Cut and Assemble the Case: Cut the various pieces of wood according to the plans and carefully assemble the clock case. Use wood glue and clamps for secure joints.
    2. Create the Clock Face: Cut and prepare the clock face from a separate piece of wood. Ensure it fits securely within the case.
    3. Install the Clock Movement: Install the clock movement kit within the case, following the manufacturer's instructions. The movement is typically housed in a separate compartment behind the clock face.
    4. Attach the Pendulum and Weights: Assemble the pendulum and weights according to the plans and attach them to the movement. The pendulum should swing freely and the weights should be securely attached.
    5. Sand and Finish: Smooth out any rough edges and sand the entire clock case. Apply a coat of stain, paint, or varnish to enhance the appearance and protect the wood.
    6. Install the Clock Hands: Once the finish has dried, attach the clock hands to the clock movement shaft.
    7. Final Touches: Install hardware such as hinges, handles, and door stops as needed.
    8. Set Up and Enjoy: Set up your grandfather clock in a prominent location and enjoy its timeless elegance and the rhythmic tick-tock of time.

    Safety Precautions

    Woodworking projects can involve sharp tools and potentially hazardous materials. It is crucial to prioritize safety and follow these guidelines:

    • Wear safety glasses and hearing protection when using power tools.
    • Always use proper tools and techniques for each task.
    • Keep work areas clean and organized.
    • Use caution when handling sharp tools.
    • Follow the manufacturer's instructions for all tools and materials.

    Conclusion

    Crafting a wooden clock is a rewarding and fulfilling woodworking project for beginners. By starting with simple designs and gradually progressing to more challenging projects, you can enhance your skills and create unique and functional pieces of art. Remember to prioritize safety and enjoy the process of bringing your creative vision to life. From the rhythmic tick-tock of a wall clock to the timeless elegance of a grandfather clock, these beginner-friendly projects offer a journey of woodworking discovery, creativity, and satisfaction.

    Read More..