DIY wooden furniture designs for modern homes

DIY Wooden Furniture Designs for Modern Homes: A Comprehensive Guide

The allure of handcrafted wooden furniture is undeniable. Its inherent warmth, timeless elegance, and sustainable nature resonate deeply with the modern aesthetic, offering a compelling alternative to mass-produced pieces. This guide explores a range of DIY wooden furniture designs perfectly suited for contemporary homes, providing detailed instructions and considerations for each project.

Section 1: Essential Considerations Before Commencing Your Project

Before embarking on any DIY furniture project, careful planning and preparation are crucial to ensure a successful outcome. This section outlines key factors to consider.

1.1 Choosing the Right Wood

The selection of wood significantly impacts the final product's appearance, durability, and workability. Hardwoods such as oak, walnut, and maple offer exceptional strength and longevity, ideal for high-traffic pieces like tables and chairs. Softwoods like pine and fir are easier to work with for beginners, suitable for projects requiring less structural integrity, such as shelves or smaller side tables. Consider the wood's grain pattern, color, and potential for finishing when making your selection.

1.2 Essential Tools and Equipment

The complexity of your chosen design dictates the necessary tools. A basic toolkit should include a measuring tape, pencil, saw (hand saw or circular saw), hand plane, chisels, sandpaper (various grits), clamps, wood glue, screws, and a drill. More advanced projects might require power tools such as a router, planer, and sander for smoother, more precise results. Investing in quality tools ensures accuracy and efficiency throughout the process.

1.3 Safety Precautions

Working with wood involves inherent risks. Always prioritize safety by wearing appropriate personal protective equipment (PPE), including safety glasses, dust mask, hearing protection (when using power tools), and work gloves. Ensure your workspace is well-lit and organized to minimize the chance of accidents. Familiarize yourself with the safe operation of all power tools before use and consult relevant safety manuals.

Section 2: DIY Projects for the Modern Home

This section showcases diverse DIY wooden furniture designs appropriate for a variety of modern interiors.

2.1 Minimalist Floating Shelves

Floating shelves offer a clean, space-saving solution for displaying books, plants, or decorative items. This project is ideal for beginners. Materials required include: chosen wood (e.g., pine), wood glue, screws, wall anchors (appropriate for your wall type), and a wood stain or paint of your choice. Construction involves cutting the shelves to the desired dimensions, attaching sturdy brackets to the back (hidden from view), and securely mounting them to the wall using appropriate anchors. A simple, minimalist design enhances the clean lines of modern interiors.

2.2 Modern Coffee Table with Integrated Storage

A coffee table with integrated storage offers both functionality and style. This project requires intermediate woodworking skills. Materials might include: plywood for the base and storage compartments, hardwood for the tabletop, wood glue, screws, hinges, and a chosen finish. The design incorporates a lift-top mechanism revealing hidden storage underneath. Precision cutting and assembly are crucial for a smooth, functional design. Consider adding caster wheels for easy mobility.

2.3 Mid-Century Modern Sideboard

A mid-century modern sideboard adds a touch of vintage charm to any contemporary space. This project requires advanced woodworking skills. Materials include: hardwood for the frame and doors, plywood for shelving, wood glue, screws, hinges, and a chosen finish. The design features clean lines, tapered legs, and simple door handles. Precise joinery techniques, such as dovetail joints, add strength and aesthetic appeal. The sideboard can be customized with varying numbers of drawers and shelves to suit individual needs.

2.4 Sleek Wooden Desk

A DIY wooden desk provides a personalized workspace tailored to individual preferences. This project requires intermediate to advanced woodworking skills, depending on the complexity of the design. Materials include: hardwood or plywood for the desktop and legs, wood glue, screws, and a chosen finish. Design considerations involve incorporating features such as cable management systems, drawer units, and adjustable height options. A simple, uncluttered design contributes to a productive and organized workspace.

Section 3: Finishing Touches and Maintenance

The final steps significantly influence the overall aesthetic and longevity of your DIY furniture. Proper finishing and maintenance are crucial.

3.1 Sanding and Finishing

Thorough sanding is essential to achieve a smooth surface. Start with coarser grit sandpaper and gradually progress to finer grits to remove imperfections and prepare the wood for finishing. Apply wood stain or paint according to the manufacturer's instructions, ensuring even coverage. Consider adding a sealant or varnish to protect the wood from moisture and scratches, enhancing durability and longevity.

3.2 Maintenance and Care

Regular maintenance helps preserve the beauty and functionality of your handcrafted furniture. Dust regularly with a soft cloth. Avoid placing hot items directly on the surface to prevent damage. For spills, immediately wipe them up to prevent staining. Periodically apply a wood polish or conditioner to maintain the wood's luster and protect it from dryness and cracking.

Section 4: Inspiration and Resources

Numerous online resources and platforms offer inspiration and guidance for DIY wooden furniture projects. Websites dedicated to woodworking, online tutorials, and social media communities provide access to a wealth of designs, techniques, and advice from experienced woodworkers. Explore these resources to discover new ideas and enhance your woodworking skills.

In conclusion, creating your own wooden furniture allows for personalized expression and the satisfaction of crafting unique pieces that perfectly complement your modern home. With careful planning, appropriate tools, and attention to detail, you can successfully build beautiful, functional, and long-lasting furniture for years to come. Remember to prioritize safety throughout the process and enjoy the rewarding experience of creating something truly special for your living space.

Read More..

How to Make a Rustic Wooden Wall Sign with Personalized Engraving

Crafting a Rustic Wooden Wall Sign with Personalized Engraving

Unleash your inner artisan and create a unique, personalized wooden wall sign that speaks volumes about your style and adds rustic charm to your home. This detailed guide walks you through the process, from selecting the perfect wood to the final engraving. Get ready to transform a simple piece of wood into a cherished keepsake!

Choosing Your Wood and Tools

The heart of your project lies in the wood itself. Opt for a reclaimed wood for an authentic rustic look, or choose a new piece of pine, cedar, or even oak, depending on your desired aesthetic and budget. Reclaimed wood often possesses beautiful natural variations in color and texture, adding character to your finished sign. For the tools, you'll need a few essentials: a saw (hand saw or circular saw), sandpaper (various grits), a wood burning tool (for engraving), a stencil (or masking tape and a sharpie), a wood stain (optional), and a clear sealant (essential for protection).

Gathering Your Supplies

Before you begin, gather all your materials in one place. This will streamline your workflow and prevent interruptions. Consider these items:

  • Wooden plank (choose your size and thickness)
  • Sandpaper (coarse, medium, and fine grits)
  • Wood burning tool with various tips
  • Stencil or masking tape and a fine-tip permanent marker
  • Wood stain (choose a color that complements your style â€" a dark walnut or a weathered gray works well for rustic aesthetics)
  • Clear sealant (water-based or oil-based, depending on your preference)
  • Safety glasses and gloves

Preparing the Wood

Begin by carefully cutting your wooden plank to your desired size and shape using your saw. Ensure your cuts are clean and straight. Then, move on to sanding. Start with coarser grit sandpaper to remove any rough edges or imperfections, gradually moving to finer grits for a smooth finish. This process is crucial for achieving a professional-looking final product. Pay close attention to the corners and edges, ensuring they are well-sanded and free from splinters.

Creating Your Design and Engraving

Now comes the fun part! Design your personalized message. Consider using a stencil for clean, crisp lettering, or get creative with freehand drawing using masking tape and a sharpie. If using a stencil, carefully secure it to your wooden plank using painter's tape. Once your design is ready, carefully use your wood burning tool to engrave your message. Take your time; precision makes a big difference in the final result. Experiment with different pressure levels and tool tips to vary line thickness and create visual interest.

Finishing Touches

Once your engraving is complete, apply your chosen wood stain if desired. Follow the manufacturer's instructions carefully, allowing ample drying time. This step enhances the wood's natural beauty and adds depth to your design. Once the stain is dry, apply several thin coats of clear sealant. This protects your artwork from moisture and wear, ensuring your rustic wooden wall sign will remain a beautiful piece for years to come. Allow sufficient drying time between coats and let the final coat cure completely before hanging.

Hanging Your Masterpiece

Finally, select the perfect spot in your home to hang your beautiful, personalized rustic wooden wall sign! You might add a simple sawtooth hanger to the back or use decorative hooks for a more rustic vibe. Admire your handiwork; you've successfully created a unique and treasured piece of home décor. The warmth and character of your handcrafted sign will bring a special touch to any room.

Read More..

DIY Wooden Key Holder for Entryways with Hooks for Keys and Accessories

A Comprehensive Guide to Crafting a Bespoke Wooden Key Holder for Enhanced Entryway Organization

The entryway, often the first and last impression of a home, frequently suffers from a lack of organized storage. A cluttered entryway can detract from the overall aesthetic appeal and create a sense of chaos. This guide provides a detailed and comprehensive approach to crafting a personalized wooden key holder, designed to elegantly manage keys, mail, and other small accessories, thus transforming your entryway into a welcoming and organized space.

I. Project Planning and Material Selection

A. Defining Project Scope and Functionality

Before embarking on the construction, carefully consider the desired dimensions and functionality of your key holder. Determine the number of hooks required to accommodate your household's keys and other items. Will it solely serve as a key holder, or will it incorporate additional features such as a mail slot, a shelf for small items, or a small cubby for frequently accessed items like sunglasses or dog leashes? Careful planning at this stage ensures a finished product that perfectly meets your needs.

B. Choosing the Right Wood

The choice of wood significantly impacts the aesthetics and durability of your key holder. Consider the following factors:

  • Hardwoods: Offer superior durability and a more refined aesthetic. Examples include oak, maple, walnut, and cherry. These woods are more resistant to scratches and dents and can withstand daily use. However, they often come at a higher price point.
  • Softwoods: More affordable but less durable than hardwoods. Pine, fir, and cedar are common choices. They are easier to work with for beginners, but may require more careful handling to prevent damage.
  • Plywood: A cost-effective alternative, particularly for larger projects. Plywood offers good stability and can be readily stained or painted to match your décor.
  • Reclaimed wood: Adds a unique character and sustainability to your project. Reclaimed wood often possesses interesting textures and variations in color, lending a rustic charm.

Consider the overall style of your entryway when selecting wood. A modern entryway might pair well with sleek maple or walnut, while a rustic setting might benefit from reclaimed wood or pine.

C. Essential Tools and Materials

Assembling your key holder requires a specific set of tools and materials. Ensure you have the following before you begin:

  • Wood: Based on your chosen dimensions and wood type.
  • Hooks: Select sturdy hooks appropriate for the weight of the items you intend to hang. Consider material (metal, ceramic) and style (modern, rustic).
  • Wood glue: A high-quality wood glue is essential for strong joints.
  • Screws or nails: Depending on your chosen fastening method. Use screws for superior strength and durability.
  • Sandpaper: Various grits (e.g., 80, 120, 220) for smoothing surfaces.
  • Wood stain or paint (optional): To enhance the wood's natural beauty or personalize the color.
  • Polyurethane sealant (optional): Protects the finished product from moisture and wear.
  • Measuring tape and pencil: For accurate measurements and markings.
  • Saw (hand saw or jigsaw): To cut the wood to the desired dimensions.
  • Drill with drill bits: For pilot holes (to prevent wood splitting) and for attaching hooks.
  • Clamps: To hold pieces together while the glue dries.
  • Safety glasses and dust mask: Essential for protecting your eyes and respiratory system from sawdust and debris.

II. Construction Process

A. Cutting and Shaping the Wood

Based on your design, accurately measure and cut the wood pieces using a saw. For intricate shapes, a jigsaw is recommended. Ensure precise cuts for a clean and professional finish. After cutting, sand the edges and surfaces to eliminate any roughness or splinters. Start with coarser grit sandpaper and progressively move to finer grits for a smooth surface.

B. Assembling the Key Holder

Apply wood glue to the joining surfaces of the wood pieces according to your design. Clamp the pieces together firmly and allow the glue to dry completely according to the manufacturer's instructions. This may take several hours or overnight. Once the glue is dry, remove the clamps and reinforce the joints using screws or nails, depending on your design and the strength required.

C. Attaching the Hooks

Drill pilot holes where you plan to attach the hooks. This prevents the wood from splitting. Then, securely attach the hooks using screws, ensuring they are firmly fastened and aligned properly. Ensure the hooks are positioned at a suitable height and spacing to accommodate your keys and other items.

D. Finishing Touches

Once the assembly is complete, sand any remaining imperfections. Then, apply wood stain or paint, if desired, following the manufacturer's instructions. Allow the stain or paint to dry completely before applying a protective sealant such as polyurethane. This adds a layer of protection against moisture and enhances the longevity of your key holder.

III. Customization and Personalization

The beauty of a DIY project lies in its ability to be personalized. Here are some ideas to customize your wooden key holder:

  • Engraving: Add a personal touch by engraving your family name, initials, or a meaningful quote onto the wood.
  • Decorative elements: Incorporate decorative elements such as small ceramic tiles, mosaic pieces, or metal accents.
  • Unique shapes: Instead of a standard rectangular shape, experiment with curved or irregular shapes to add visual interest.
  • Different finishes: Explore various stain colors and finishes to achieve a desired look, from a rustic patina to a modern sleek finish.
  • Integrated storage: Add a small shelf or cubby to the design for additional storage.

IV. Conclusion

Crafting a DIY wooden key holder is a rewarding project that combines creativity and practicality. By following the steps outlined in this guide, you can create a functional and aesthetically pleasing addition to your entryway. Remember to prioritize safety throughout the construction process and take your time to ensure a high-quality finished product. Your personalized key holder will not only enhance the organization of your entryway but also serve as a testament to your craftsmanship and attention to detail. Enjoy the process and the satisfaction of creating something unique for your home.

Read More..

Wooden Bird Feeders That Will Appeal to Eco-Friendly Buyers

Wooden Bird Feeders That Will Appeal to Eco-Friendly Buyers

Wooden Bird Feeders That Will Appeal to Eco-Friendly Buyers

In a world increasingly conscious of environmental impact, eco-friendly choices are becoming more than just a trend; they are a necessity. Bird feeders, a beloved staple in many gardens, are no exception. As consumers seek sustainable options, wooden bird feeders are gaining popularity, offering a natural and aesthetically pleasing alternative to plastic feeders. This article delves into the reasons why wooden bird feeders are gaining traction among eco-conscious buyers, exploring their environmental benefits and the key factors to consider when making a purchase.

The Growing Demand for Sustainable Bird Feeders

The demand for sustainable bird feeders stems from a growing awareness of the environmental impact of plastic waste. Plastic bird feeders, while often durable and affordable, can take hundreds of years to decompose, contributing to land pollution and harming wildlife. Consumers are increasingly opting for products that align with their values, choosing materials that are renewable, biodegradable, and minimally processed. This shift in consumer preferences is driving the popularity of wooden bird feeders, which offer a more environmentally responsible alternative.

Benefits of Wooden Bird Feeders for Eco-Conscious Buyers

Wooden bird feeders hold a significant appeal for eco-friendly buyers due to their inherent sustainability and environmental benefits. Here's a closer look at why these feeders are a better choice for the planet:

1. Renewable and Biodegradable Materials

Wood, a renewable resource, is the cornerstone of these feeders. Unlike plastic, which is derived from fossil fuels, wood is naturally replenished through responsible forestry practices. Additionally, wood is biodegradable, breaking down naturally over time, minimizing its impact on the environment. This makes wooden bird feeders a far more eco-conscious choice compared to plastic feeders.

2. Reduced Plastic Waste

By opting for wooden feeders, buyers actively contribute to reducing plastic waste. This minimizes the burden on landfills and the negative impacts of plastic on ecosystems and wildlife.

3. Natural Beauty and Integration with Gardens

Wooden bird feeders seamlessly blend into the natural environment, adding a touch of rustic charm to any garden. The warm tones and textures of wood complement surrounding greenery, enhancing the aesthetic appeal of outdoor spaces. This natural integration creates a harmonious setting for both birds and homeowners.

4. Support for Sustainable Forestry Practices

The growing demand for wooden bird feeders can incentivize sustainable forestry practices. When purchasing wooden feeders, it's essential to choose products made from responsibly sourced wood. Look for certifications like FSC (Forest Stewardship Council) or PEFC (Programme for the Endorsement of Forest Certification) to ensure that the wood comes from forests managed sustainably.

Key Factors to Consider When Choosing a Wooden Bird Feeder

While the benefits of wooden bird feeders are clear, there are some important factors to consider before making a purchase:

1. Wood Type and Durability

Different wood types offer varying levels of durability and resistance to weathering. Some popular choices include cedar, redwood, and pressure-treated pine. Cedar and redwood are naturally resistant to rot and insects, making them excellent choices for outdoor applications. Pressure-treated pine, while less naturally resistant, can be treated with preservatives for added longevity. The specific needs and preferences of the buyer will determine the best wood choice.

2. Construction Quality and Design

Choose feeders with sturdy construction, well-joined components, and durable finishes. A well-built feeder will withstand the elements and provide long-lasting enjoyment. The design of the feeder should also consider the needs of the birds, providing easy access to food and safe perching areas. A design that prevents squirrels from accessing the food is also essential.

3. Maintenance and Cleaning

While wooden feeders are naturally beautiful, they require regular maintenance to keep them in good condition. Cleaning and waterproofing the feeder regularly will prolong its lifespan. Using natural cleaning products and biodegradable paints or stains can further minimize the environmental impact of the feeder.

4. Local Craftsmanship and Support for Small Businesses

Consider supporting local craftspeople and small businesses that specialize in making wooden bird feeders. This not only fosters sustainable practices but also strengthens local economies.

Conclusion: A Greener Choice for Bird Lovers

Wooden bird feeders offer a compelling alternative to plastic feeders, aligning with the increasing demand for eco-friendly products. Their renewable materials, reduced plastic waste, natural aesthetics, and potential for supporting sustainable forestry practices make them a responsible choice for environmentally conscious buyers. By considering key factors such as wood type, construction quality, and maintenance practices, buyers can select wooden bird feeders that will provide years of enjoyment while minimizing their environmental impact.

Read More..

How to Build Wooden Key Racks That Appeal to Home Decor Lovers

How to Build Wooden Key Racks That Appeal to Home Decor Lovers

Craft the Perfect Key Rack: Enchanting Wooden Designs for Every Home

Keys, the silent guardians of our homes, deserve more than just a haphazard toss on the countertop. A thoughtfully crafted key rack elevates this everyday object to a statement piece, adding a touch of warmth and personality to any entryway. Embrace the artistry of woodworking to create a key rack that's not just functional, but also a captivating focal point in your home decor.

Embrace the Charm of Natural Wood

The beauty of wood is its inherent warmth and character. Choose from a variety of wood types to match your home's aesthetic: the classic elegance of walnut, the rustic charm of pine, the sleek sophistication of maple, or the vibrant energy of cherry. Each wood species brings unique grain patterns and color tones, adding a touch of nature's artistry to your key rack.

Go Beyond the Traditional

While traditional key racks often feature simple rows of hooks, explore more creative designs to make your piece truly stand out. Experiment with:

  • Geometric Shapes: Sculpt the wood into interesting shapes like hexagons, triangles, or even whimsical clouds.
  • Branch-Inspired Designs: Embrace natural textures by incorporating real branches or twigs into the design, adding a touch of the outdoors.
  • Personalized Touches: Incorporate your initials, family names, or even a decorative house icon for a truly personal touch.

Craft with Purposeful Finishes

The finishing touches can truly elevate your wooden key rack from ordinary to extraordinary. Explore a range of options:

  • Natural Finish: Embrace the wood's natural beauty with a clear coat of sealant, allowing its grain patterns to shine through.
  • Stained Finish: Enhance the wood's color and texture with a rich stain, adding depth and warmth.
  • Painted Finish: Let your creativity flow with a vibrant paint color, creating a bold statement piece that reflects your personality.

Embrace the Joy of Functionality

Beyond aesthetics, ensure your key rack is practical and user-friendly. Consider:

  • Sturdy Hooks: Choose strong, durable hooks that can handle the weight of keys and keychains.
  • Convenient Placement: Position the key rack in a high-traffic area, ideally near the entryway, for easy access.
  • Additional Storage: Incorporate a small shelf or compartment for mail, sunglasses, or other small essentials.

By combining creative woodworking techniques with thoughtful design elements, you can craft a wooden key rack that's both functional and aesthetically pleasing. It's a project that's sure to impress, adding a unique touch to your home and showcasing your talent as a craftsperson.

Read More..

Wooden Wine Racks That Look Expensive but Are Easy to Build

Wooden Wine Racks That Look Expensive but Are Easy to Build

Wooden Wine Racks That Look Expensive but Are Easy to Build

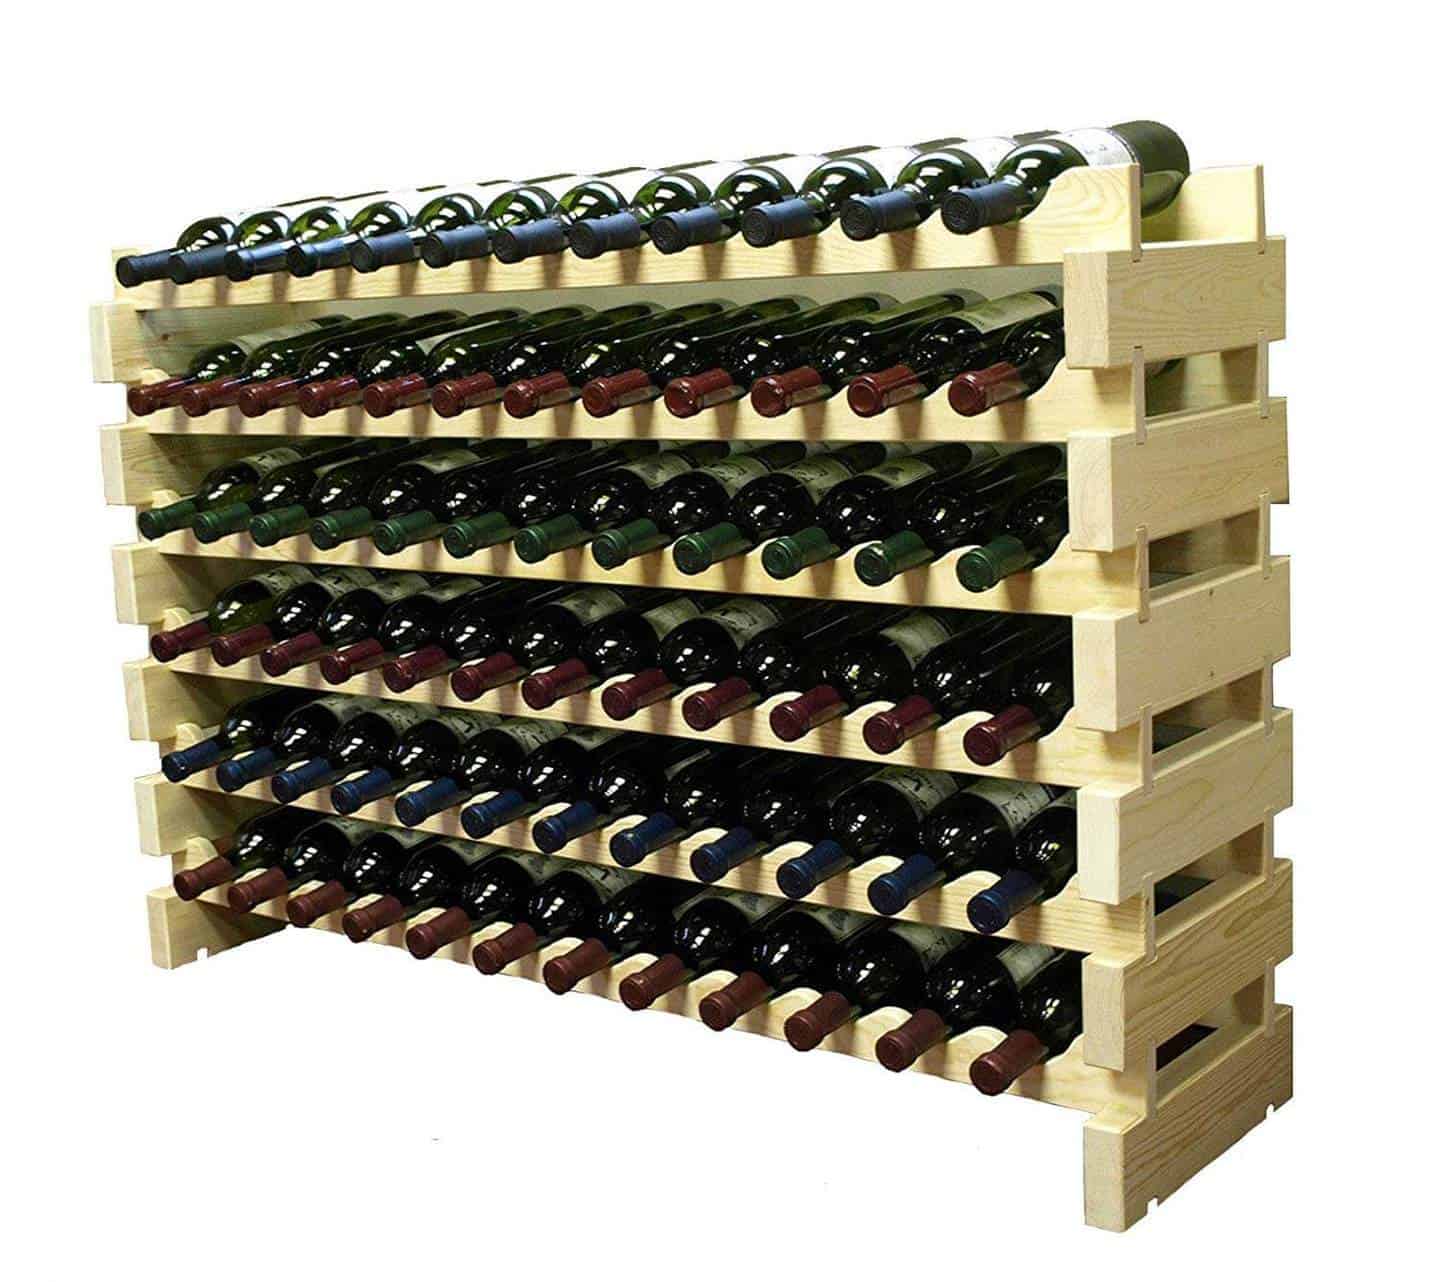
Have you ever admired those sleek, stylish wine racks you see in magazines and home design blogs? They look luxurious and expensive, but you might be hesitant to invest in them. Don't worry! You can achieve that same sophisticated look without breaking the bank. Building your own wine rack is a rewarding and surprisingly simple project, and it’s a great way to add a touch of personalized charm to your home. In this guide, we'll walk you through creating a stunning wine rack that will impress your guests and elevate your home decor, all while keeping your budget in check.

Choosing the Right Wood

The wood you select plays a crucial role in both the aesthetics and the longevity of your wine rack. For a timeless and elegant feel, consider hardwoods like:

  • Oak: A classic choice known for its durability, rich grain patterns, and warm tones. Oak is a popular choice for wine racks because it stands up to wear and tear and adds a touch of rustic elegance.
  • Walnut: With its stunning dark brown hues and intricate grain patterns, walnut exudes sophistication and a touch of luxury. It's perfect for creating a refined and elegant look for your wine rack.
  • Cherry: Known for its reddish-brown tones and beautiful grain patterns, cherry wood adds a warm and inviting feel to your wine rack. It's a fantastic choice for those seeking a more traditional and elegant look.

If you prefer a more budget-friendly option, consider using pine, maple, or birch. These softer woods are easier to work with and readily available at most lumberyards. However, they may require a bit more attention to finishing and care to ensure durability.

Essential Tools and Materials

Before embarking on your wine rack building journey, gather these essential tools and materials:

  • Wood: Choose your preferred wood species and purchase the necessary dimensions for your rack.
  • Saw: A circular saw or a miter saw will help you accurately cut the wood to size.
  • Drill: A cordless drill with various drill bit sizes will be needed for creating holes and attaching the components.
  • Screwdriver: A Phillips-head screwdriver is a must-have for assembling the rack.
  • Sandpaper: Use different grits of sandpaper to smooth out the wood and create a consistent finish.
  • Wood glue: For bonding the wood pieces together.
  • Wood stain or paint (optional): To enhance the natural beauty of the wood or to add a pop of color.
  • Finish (optional): A polyurethane or varnish to protect the wood and provide a lasting sheen.
  • Measuring tape: For accurate measurements.
  • Level: To ensure your rack is perfectly straight.

Simple Wine Rack Designs

Here are a couple of simple wine rack designs that are perfect for beginners.

Classic Shelf Wine Rack

This design is straightforward and can be customized to accommodate different wine bottle sizes.

  1. Cut the wood: Start by cutting your wood to the desired dimensions. For example, you could cut two long pieces for the sides, two shorter pieces for the top and bottom shelves, and then cut pieces for additional shelves based on the height of your bottles.
  2. Assemble the shelves: Using wood glue and screws, secure the shelves to the sides. Be sure to keep the shelves level.
  3. Sand and finish: Once your rack is assembled, sand the entire surface to create a smooth finish. Then, apply a stain or paint if desired.
  4. Protect the wood: Apply a polyurethane or varnish to seal the wood and protect it from spills and scratches.

Vertical Wine Rack

A vertical wine rack offers a space-saving solution and adds visual interest to your wall.

  1. Cut the wood: You'll need to cut wooden slats or boards to create the vertical supports for your bottles.
  2. Secure the supports: Using screws and wood glue, attach the vertical slats to a base board.
  3. Add supports (optional): You may want to add additional horizontal supports for extra stability.
  4. Sand, stain, and finish: Smooth the rack with sandpaper, and then stain or paint the wood as desired. Apply a protective finish for durability.

Tips for Building a Wine Rack

Here are some additional tips to ensure your DIY wine rack turns out perfectly:

  • Plan your design: Before you start cutting wood, sketch out your wine rack design on paper. This will help you visualize the final product and calculate the necessary materials.
  • Use a saw guide: If you’re using a circular saw, use a guide to ensure precise cuts.
  • Pre-drill holes: Before driving screws into the wood, pre-drill holes slightly smaller than the screw size to prevent splitting.
  • Sand between coats: If you’re staining or painting the wood, sand between coats to create a smooth and even finish.
  • Let it dry: After applying glue, stain, or finish, allow it to dry completely before handling the rack.

Enjoying Your DIY Wine Rack

Building your own wine rack is a fulfilling project that will allow you to showcase your favorite bottles in style. You’ll have a unique piece of furniture that complements your decor and serves as a conversation starter. So, gather your tools, choose your wood, and unleash your creativity. You'll be surprised at how easy it is to build a stunning wine rack that will make your home feel even more inviting.

Read More..

Lawn Chair Projects with Custom Design Features for Extra Appeal

Lawn Chair Projects with Custom Design Features for Extra Appeal

Up Your Lawn Game: DIY Lawn Chair Projects with Custom Design Features

Tired of those boring, basic lawn chairs? Want to add a touch of personality and style to your outdoor space? Look no further than DIY lawn chair projects! You can transform those ordinary chairs into unique and eye-catching pieces with a little creativity and some simple materials. Let's dive into some inspiring ideas and unlock your inner DIYer!

Get Creative with Paint!

Painting is the simplest and most impactful way to revamp your lawn chairs. Unleash your artistic spirit and explore a world of colors and patterns. Here are a few fun ideas:

Rainbow Brights

Who says lawn chairs have to be boring? Go bold with a rainbow of colors! Pick your favorite hues and paint each chair with a different color for a vibrant and cheerful look. You can even paint each chair in stripes or gradients for extra flair.

Geometric Patterns

For a more modern and sophisticated look, try incorporating geometric patterns. Use painter's tape to create sharp lines and shapes. You can stick with simple geometric shapes or get creative with intricate designs. A combination of colors and textures can really elevate the look.

Faux Wood Finish

Love the look of wooden furniture but don't want to deal with the hassle of working with wood? No problem! Achieve a faux wood finish with paint and a little bit of technique. Use brown and white paint to create a realistic wood grain effect. You can even add a bit of glaze for an extra touch of depth.

Beyond Paint: Adding Texture and Dimension

Want to take your lawn chair projects to the next level? Try incorporating different textures and materials to add dimension and visual interest.

Rope Accents

Rope is a fantastic material to add a rustic and nautical feel. You can wrap rope around the arms or back of the chair, or even create a whole new seat using woven rope. The possibilities are endless!

Fabric Upholstery

Transform your lawn chair with a fresh fabric makeover! Choose a pattern or color that complements your outdoor space. You can use fabric glue or a staple gun to attach the fabric to the chair. Don't forget to add some extra padding for comfort!

Mosaic Tiles

For a bold statement, cover the seat or back of your chair with mosaic tiles. You can use broken pieces of ceramic tiles, glass tiles, or even pebbles. Use a strong adhesive to attach the tiles and grout for a polished finish.

Creative and Fun Design Features

Let's talk about those unique details that make your DIY projects stand out. Here are some fun and functional design features you can add:

Built-in Drink Holders

Say goodbye to wobbly drinks! Add built-in drink holders to your lawn chairs for a convenient and practical touch. Use PVC pipe, metal rings, or even wooden dowels to create your drink holders. You can attach them directly to the arms or create a separate tray for your drinks.

Backrest Storage

Keep your essentials within reach! Add a pocket or compartment to the back of your chair to hold your phone, book, or other necessities. Use fabric, leather, or even a repurposed canvas bag to create your storage solution. You can even add a zipper for secure closure.

Footrests

Elevate your relaxation! Add a footrest to your chair to maximize comfort. You can use wooden planks, metal bars, or even repurposed pieces of furniture to create your footrest. Attach it to the chair using hinges or simply place it directly beneath the chair.

Personal Touches

Add your personal stamp to your lawn chairs with unique embellishments. Here are a few ideas:

  • Add your initials or a monogram for a personalized touch.
  • Paint whimsical designs or quotes for a fun and quirky look.
  • Decorate your chairs with flowers, ribbons, or other festive elements.

Ready to Upcycle and Repurpose?

Don't throw away those old lawn chairs! Repurpose them into something new and exciting. Here are some creative ideas:

Transform into Garden Planters

Give your plants a stylish home! Turn your old chairs into planters by filling them with potting soil and your favorite plants. For a whimsical look, paint the chairs in bright colors or add decorative elements like floral designs.

Create a Unique Side Table

If you're in need of a side table for your outdoor space, repurpose your old chairs into stylish and functional pieces. Use wood, metal, or even fabric to create a tabletop surface and attach it to the chair frame. You can even add wheels for easy mobility.

Build a Cozy Outdoor Bed

For ultimate relaxation, combine several chairs to create a cozy outdoor bed. Use strong ropes or straps to attach the chairs together and add a comfortable mattress for a luxurious experience. You can even create a canopy with fabric for a more intimate setting.

Safety First: Tips for DIY Lawn Chair Projects

Before you start, remember to prioritize safety! Here are some tips to keep in mind:

  • Always wear safety glasses and gloves to protect yourself from injuries.
  • Use a well-ventilated area when working with paint or other potentially hazardous materials.
  • Make sure your chairs are stable and structurally sound before adding any design features.
  • If you're unsure about any steps, consult a professional or watch instructional videos to ensure you're working safely.

With a little imagination and effort, you can transform your ordinary lawn chairs into unique and eye-catching pieces that will make your outdoor space truly special. So get creative, have fun, and don't be afraid to experiment! You might just surprise yourself with the amazing results you achieve.

Read More..