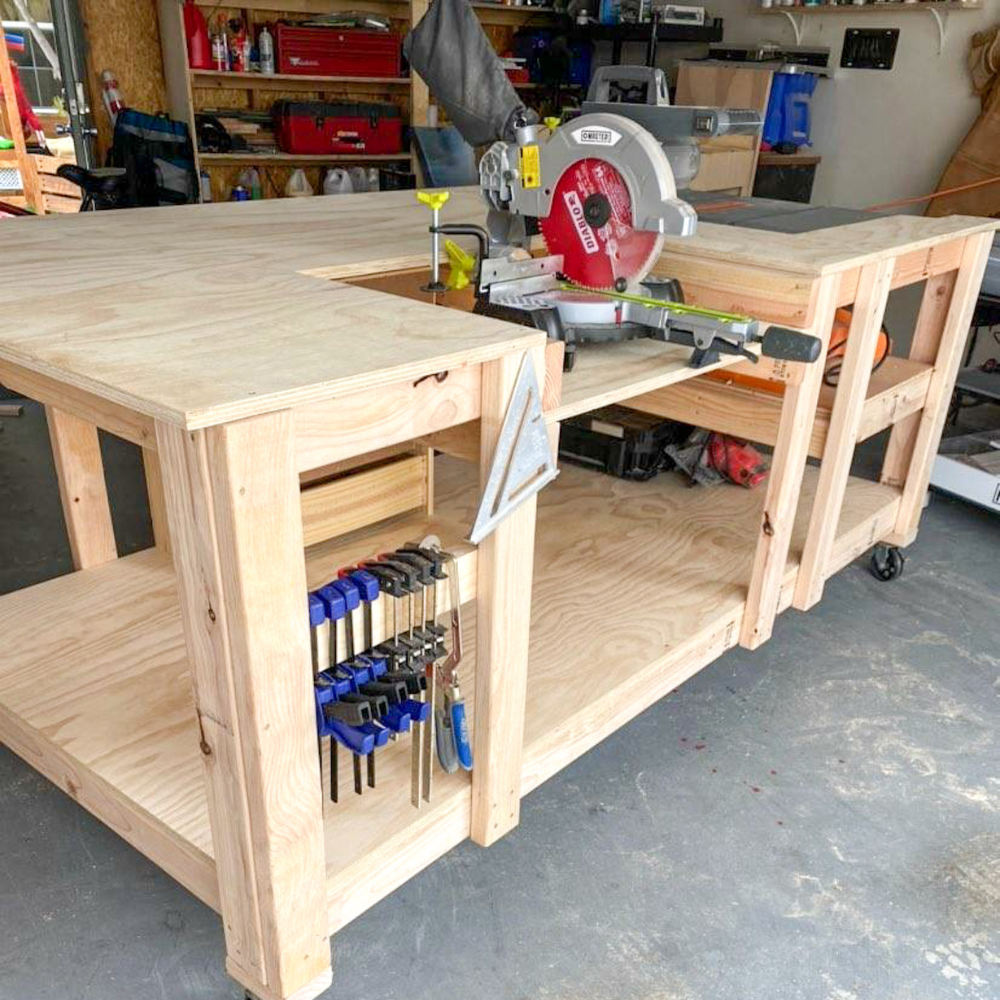

Alright, you want to build a workbench that can handle both your table saw and miter saw? Awesome! You're about to make your workshop a whole lot more efficient and enjoyable. Here's how we're going to break this down:
Why a Dedicated Workbench?
Think of it this way: You wouldn't want to use your kitchen counter as a workbench, would you? A dedicated workbench gives you a stable, flat surface specifically designed for woodworking. Here's why that's crucial:
Safety First: A solid workbench prevents your tools from wobbling, which is dangerous and leads to inaccurate cuts.
Accuracy is King: Precise cuts are essential for good-looking projects.
Organization is Key: A designated space for your tools and materials means you'll spend less time searching and more time creating.
Table Saw Integration:
The Outfeed Table: The most important thing is to create a smooth, stable surface for your table saw's outfeed. This prevents kickback and ensures your wood glides safely and accurately.
Extension Options: You can either build the outfeed table directly into the workbench, or create a separate extension that clamps on. Both options work, it just depends on your space and preference.
Dust Collection: A must! You'll want to incorporate dust collection into your workbench design to keep the air clean and your lungs happy.
Miter Saw Station:
Dedicated Station: Create a raised platform or shelf for your miter saw. This ensures the cut line is at a comfortable working height.
Material Support: Don't forget to build in a sturdy support for your materials. This can be a simple shelf or even a rolling cart.
Storage: Keep your miter saw blades and other accessories organized. Consider adding drawers, shelves, or pegboards.
Building the Workbench:
Materials: Choose strong, sturdy materials like plywood or MDF for the base and top. Use 2x4s or 4x4s for the legs and supports.
Construction: Start with a frame for the base, then add your top, supports, and any shelves or platforms you need. Make sure to secure everything with strong screws and glue.
Finish: Sand down the surfaces and apply a finish that protects the wood and makes cleaning easy.
Step-by-Step Guide:
1. Plan it Out: Draw a diagram of your workbench and its dimensions, including the placement of your tools.
2. Gather Materials: Head to your local lumber yard or home improvement store and pick up everything you need.
3. Cut and Assemble the Base: Cut the wood for the base frame and assemble it using glue and screws.
4. Add Supports: Build the supports for your tools, including the outfeed table and miter saw station.
5. Construct the Top: Cut the plywood or MDF for the top and secure it to the frame.
6. Incorporate Dust Collection: Add dust collection ports and connect them to your dust collector.
7. Finish and Detail: Sand, prime, and paint your workbench. Add any finishing touches like handles, shelves, or storage.
Important Tips:
Measure Twice, Cut Once: Precision is key! Double-check your measurements before making any cuts.
Use the Right Tools: Invest in good quality tools that will make the job easier and safer.
Safety First: Wear safety glasses, ear protection, and a dust mask whenever working with power tools.
Take Your Time: Building a workbench takes time and effort, so don't rush it.
Ready to Get Started? Go ahead and take a look at some free plans online to help you visualize your design. Remember, this is your workbench, so personalize it to fit your needs and style. Happy building!
0 comments:
Post a Comment